This blueberry and raspberry skillet cake is a burst of fruity deliciousness, combining the sweet and tangy flavors of fresh berries with a golden, caramelized crust. Each bite is a perfect blend of juicy berries and moist, tender cake, making it an irresistible treat.
Showing posts with label raspberry. Show all posts
July 20, 2024
Blueberry & Raspberry Muffin Skillet Cake ~ #TheCakeSliceBakers
March 20, 2022
Anna's Almond-Brown Butter Cake ~TheCakeSliceBakers
Nutella-flavored whipped cream, chocolate shavings, and raspberries are the perfect accompaniment
to the nutty, caramelized flavor that comes from both the brown butter and almond flour.
May 20, 2021
Siren's Chocolate Cake ~ #TheCakeSliceBakers
You will hear the Siren calling to you to come and get a slice or
two of this amazing chocolate cake paired with raspberries
August 20, 2018
Raspberry Charlotte ~ #TheCakeSliceBakers
Labels:
#CakeSliceBakers,
cake,
celebration,
charlotte,
cream,
fruit,
jam,
raspberry,
Raspberry Charlotte,
sponge
January 23, 2018
Chocolate Brownie Raspberry Sorbet Cookie Sandwiches ~ #CreativeCookieExchange
Life is better with fresh baked cookies - especially these Chocolate Brownie Raspberry Sorbet Cookie Sandwiches.
July 20, 2017
Raspberry Financiers ~ #TheCakeSliceBakers
Financiers are the perfect accompaniment to an afternoon tea. They are delicate, buttery, French almond tea cakes that are made with browned butter which gives the cake an extra layer of flavor.
Labels:
#TheCakeSliceBakers,
financiers,
friands,
raspberry,
sponge cake
September 16, 2013
Melting Moments - #CreativeCookieExchange
Melting Moments how do I love thee, let me count the ways - melt-in-your-mouth, buttery, rich crumbs that shatter on the first bite, sweet vanilla buttercream, tart raspberry jam. This cookie is definitely a match made in heaven, and that is why I choose it as my first post for the Creative Cookie Exchange.
The Creative Cookie Exchange was established by Laura (The Spiced Life) and Rebecka (At Home with Rebecka), with the idea that we will all have fun baking cookies together. Each month an ingredient or theme will be selected and then we will all be baking some amazing cookies and sharing them with you on our blogs.
The theme selected for this month is Back to School. Whether it is a cookie that I have packed in their lunch boxes, or a special after school treat I just love making cookies for my girls. They are in high school now, and have very busy schedules, but I just love the idea that I have sent them to school with a little treat that will remind them that I am thinking about them. It is also a lot of fun to make a double batch and send the cookies to school for them to share with their friends (and it removes the temptation from me ;)).
The Melting Moment is a cookie that is very popular in Australia, where you will find them in grocery stores, cake shops, and cafes. There appears to be two schools of thought with regards to the addition of jam, with some people stating that if you add jam it is actually called a Monte Carlo. I saw this cookie being made on MasterChef Australia (which in my opinion is far superior to the format of the US MasterChef - the contestants are much nicer to one another and the judges more supportive) and I decided to add the raspberry jam as per the recipe, and I am glad that I did.
The only change I made to the original recipe (besides converting it from metric to imperial) was to make the cookies a bit smaller, although after sandwiching them together, I realized that I should have flattened them just a little more because they tended to roll around the plate. Next time I would flatten half of the cookies, and use a fork to indent the rest. Also, I choose to make the raspberry jam, but you could certainly use store-bought, or even change the flavor if you wanted. The recipe for the jam does produce more than enough to fill the cookies, so if you do not want leftovers, cut this in half. The recipe made about individual 22 cookies, so 11 when sandwiched together.
Melting Moments
(Printer Friendly Recipe)
Ingredients
Biscuits ~
- ¾ cup butter (1½ sticks)
- ½ cup powdered sugar, sifted
- ½ cup custard powder (or cornstarch)
- 1 teaspoon baking powder
- 1½ cups all-purpose flour
- powdered sugar, to serve
Vanilla Buttercream ~
- 7 tablespoons butter, softened
- 2 teaspoons vanilla bean paste
- 1 cup powdered sugar, sifted
Raspberry Jam ~
- 2 cups fresh or frozen raspberries
- 1¼ cups sugar
- 1 tablespoon lemon juice
- ½ teaspoon gelatin powder
Preparation
Biscuits ~
- Preheat oven to 180°C. Line two oven trays with Silpats or parchment paper.
- In the bowl of an an electric mixer with paddle attachment, cream butter for two minutes.
- Add powdered sugar and custard powder (or cornstarch) and mix until combined.
- Sift the baking powder and flour together then add to the dough and mix well, scraping down the sides of the bowl and beaters as needed.
- Roll dough into 1 tablespoon-size balls, place on a baking paper lined baking tray and press each ball with a fork to leave an indent.
- Bake biscuits for 14 minutes or until light golden.
- Stand on trays 5 minutes to cool then transfer to a wire rack to cool completely.
- Make buttercream and jam while waiting for the cookies to cool.
- Place a spoonful of cooled jam on the base of half the biscuits.
- Pipe buttercream in a circle onto the base of the other half of the biscuits. Gently press one of each biscuit together to form a melting moment.
- Dust with icing sugar before serving.
Vanilla Buttercream ~
- In the bowl of an electric mixer add butter and vanilla paste and mix until smooth.
- Add powdered sugar and beat until mixture forms a paste, the consistency of thick icing.
- Spoon into a piping bag fitted with a small star nozzle.
Raspberry Jam ~
- Place raspberries, sugar and lemon juice in a small saucepan and cook for 20-30 minutes on medium heat until thickened.
- Mix gelatin powder with one tablespoon cold water together.
- Remove the jam from the heat, stir through gelatin mixture.
- Transfer to a heatproof bowl and cool in the fridge.
- Write a blog post with recipe and original photo (please include some language here specific to that month's theme). We would like the recipe to be one you’re making for the first time, and photos must be original.
- Post the Cookie Exchange badge somewhere on your blog so others can join in the fun ~
- Make a good faith effort to visit and comment on the other cookies in the Linky party. We alllove cookies so that should be easy!
- LIKE the Creative Cookie Exchange Facebook Page.
- FOLLOW the Creative Cookie Exchange Pinterest Board.
- LINK your blog post below using the Linky tool.
You can also just use us as a great resource for cookie recipes - be sure to check out our Facebook page, our Pinterest Board, and our monthly posts. You will be able to find them the first Tuesday after the 15th of each month! Also, if you are looking for inspiration for this month's theme, check out what all of the hosting bloggers have made so far ~
May 20, 2013
The Cake Slice Bakers May 2013 - The Pink Cake
This year is certainly zipping along, and it is already time once again for the Cake Slice Baker's latest cake. It is hard to believe that this will be the seventh cake we have baked from Vintage Cakes by Julie Richardson. The votes were tallied and the cake with the most votes this month was The Pink Cake, which according to the author, is the most popular cake at her bakery, Baker & Spice.
Each and every cake we have baked has been a lot of fun, and this one was no exception. However, have you ever felt jinxed when baking a cake? This cake definitely had me feeling like there was some sort of curse on it. Before even getting the cakes in the oven I had taken the skin off the top of my hand getting ingredients out of the cupboard, managed to spill flour all over the floor, and whilst separating the eggs I got some of the yolk in the whites, meaning that they could no longer be used for the buttercream. The bad luck continued when I discovered that my cake tins were actually 9-inch, rather than the 8-inch listed in the recipe, so the layers were too thin and I had to make another batch of cakes. The final straw was when I was taking photos of the cake and my background fell on the cake destroying the top of it.
But baker's are a hardy bunch and they certainly do not give up. So, despite all of the bad luck with the cake, it actually came out tasting pretty good, and it looked fine once I had repaired my evil backboards damage. As I mentioned above I ended up with 6 layers because I baked two batches of 9-inch cakes, and it would have been fun to use them all and make a really tall cake, but I was worried that I would not have enough frosting, so I decided to go with four layers. The author mentions in the book that at her bakery they use a sugar syrup to coat the layers. I decided that since the raspberries were quite expensive I would try and make use of the seeds. Following the authors suggestion I made a simple syrup, but then went out on my own and added some creme de cacao and the raspberry seeds, and left it overnight to steep. The next day I simply strained out the seeds leaving a delicious chocolate-raspberry syrup to brush over each of my layers.
This cake has a rich chocolate flavor that I really like and a subtle raspberry taste in the frosting. I loved the chocolate-raspberry taste, and the little bit of moistness that the syrup added to the cake. You can see from my pictures that I did not place too much frosting in-between the layers as I find that the sweetness of the buttercream can overwhelm the cake. I realize that looking at the preparation list may seem a little intimidating, but this cake is not hard to make. Sure, there are a few steps, but if you divide them up over a couple of days it will seems like a breeze, and just think how super impressed everyone will be with this cake when you say "I made it myself".
I am including a link here to the blogs of my fellow Cake Slice Baker's so that you can check out all of their beautiful creations. I am betting that their luck may have been a little better than mine whilst baking this particular cake. Also, we have launched a Facebook page that features not only our cake's each month, but all sorts of other goodies made by the group.
The Pink Cake
Ingredients
Cake ~
- 4 ounces unsweetened chocolate, chopped
- ¼ cup lightly packed premium unsweetened Dutch-processed cocoa
- ¾ cup boiling water
- ¾ cup full-fat sour cream
- 1 tablespoon pure vanilla extract
- 2 cups all-purpose flour
- ¾ teaspoon baking soda
- 1 teaspoon fine sea salt
- ½ cup unsalted butter, at room temperature
- 1 cup firmly packed light brown sugar
- ¾ cup granulated sugar
- ½ cup canola oil
- 3 egg yolks, at room temperature
- 3 eggs, at room temperature
Raspberry Buttercream ~
Recipe by Julie Richardson - Vintage Cakes
- 6 egg whites
- 1¼ cups sugar
- ¼ teaspoon cream of tartar
- 2 cups unsalted butter, at room temperature, cut into small cubes
- 2 teaspoons pure vanilla extract
- ⅛ teaspoon fine sea salt
- 4 cups raspberries, fresh or frozen (if using frozen berries, measure them before thawing)
Creme de Cacao-Raspberry Simple Syrup ~
- ½ cup boiling water
- ½ sugar
- 1 tablespoon creme de cacao
- raspberry seeds leftover from the buttercream
Preparation
Cake ~
- Center an oven rack and preheat the oven to 350℉.
- Put the unsweetened chocolate and the cocoa into a small bowl.
- Pour the boiling water over the chocolate and allow it to steep for 1 minute, then whisk the mixture together.
- Whisk in the sour cream and vanilla and set aside.
- Sift together the flour, baking soda, and salt in a bowl, then whisk the mixture by hand to ensure that the ingredients are well mixed.
- In the bowl of a stand mixer fitted with the paddle attachment, cream the butter and both sugars together on medium-high speed until light, about 3 minutes, stopping the mixer frequently to scrape the paddle and the sides of the bowl with a rubber spatula.
- On low speed, drizzle the oil into the mixture until blended, then turn the mixer up to medium-high speed and beat until the batter is fluffy, about 3 more minutes.
- Blend in the eggs and egg yolks one at a time, adding the next one as soon as the previous one has disappeared into the batter.
- With the mixer on low speed, add the flour mixture in three parts, alternating with the chocolate mixture in two parts, beginning and ending with the flour. After each addition, mix until just barely blended and stop and scrape the bowl. Stop the mixer before the last of the flour has been incorporated and complete the blending by hand with a rubber spatula to ensure you do not overbeat the batter.
- Divide the thick batter equally among the prepared pans (there will be approximately 1 pound 2 ounces per pan).
- Smooth the tops and tap the pans on the counter to settle the batter and eliminate any large air bubbles. Bake in the middle of the oven until the centers spring back when lightly touched, 22 to 25 minutes. Cool the cakes in their pans on a wire rack for 30 minutes. Flip the cakes out of the pans, leaving on the parchment paper until you assemble the cake. Let them continue to cool on the rack, top sides up, until they reach room temperature.
Buttercream ~
- Mash and strain 4 cups of raspberries through a fine mesh sieve to catch the seeds.
- Discard the seeds and set aside.
- Using a hand whisk, whisk together the egg whites, sugar, and cream of tartar in the clean bowl of a stand mixer.
- Place the bowl over (not in) a saucepan of simmering water. The egg white mixture will be gloppy and thick, but as the mixture begins to warm up, it will become more fluid. Continue to gently whisk the mixture until it is very hot to the touch (130°F on a candy thermometer).
- Move the bowl to the stand mixer and, using the whisk attachment, whip the whites on medium-high speed until they have tripled in volume and are thick and glossy and hold stiff peaks (like meringue), 3 to 4 minutes.
- Turn the mixer down to medium-low speed until the mixing bowl is just cool to the touch, 1 to 2 minutes.
- Turn the mixer back up to medium-high speed and add the butter one piece at a time, adding the next piece just as the previous one has been incorporated, stopping the mixer every so often to scrape down the escaping buttercream from the sides of the bowl. At some point, the buttercream will take on a curdled appearance; don't worry, this is normal. Just keep on mixing until it comes together. Once all the butter is incorporated and the frosting is fluffy and creamy, blend in the raspberry puree, vanilla and salt until fully combined.
- Covered with plastic wrap, buttercream will last 2 days at room temperature or 7 days in the refrigerator. If refrigerated, the buttercream must be brought to room temperature before you use it. Either way, the buttercream must be rewhipped—either by hand if kept at room temperature or with a mixer if refrigerated—before you frost a cake with it.
Creme de Cacao-Raspberry Simple Syrup ~
- Mix all ingredients in a container, cool, and leave in refrigerator overnight.
- Strain seeds from mix, and discard.
Assemble the cake ~
- Lay one of the cakes top side up on a cake plate.
- Brush with creme de cacao-raspberry simple syrup.
- Using a metal spatula, frost the top with 3/4 cup of buttercream, spreading it out to the edge of the cake (the filling will be about 1/4 inch thick).
- Stack the second cake top side up on top of the frosted cake, brush with syrup, and spread another 3/4 cup of buttercream on top of it.
- Stack the last layer of cake top side up on top and brush with the simple syrup. Look for any frosting that may have oozed out beween the layers and spread it along the sides of the cake. Apply a thin layer of frosting all over the cake to create a "crumb coat."
- Place the cake in the refrigerator until the frosting is firm, about 10 minutes.
- Take it out and frost the cake with the remaining buttercream, using your spatula to make decorative swirls.
- Store the cake in an airtight container at room temperature for up to 3 days.
Recipe by Julie Richardson - Vintage Cakes
May 14, 2013
Vanilla Twinkie Bundt Cake with Raspberries - #BundtaMonth
Who doesn't love a good bundt? There are so many different flavors and absolutely beautiful bundt pans to choose from, that it is always exciting to make one. It would be very easy for me to start a bundt pan collection if only I had the room to store them all. They can be classic or extremely intricate, but all produce beautiful cakes.
Over the past few months I noticed that Laura from The Spiced Life participates in a blogging event called #Bundt-a-Month, which is the of creation of Baker Street and Cake Duchess. Each month a theme or a particular ingredient(s) is chosen for the month, and then everyone gets to create a beautiful bundt. I went to check out some of these cakes and I realized two things - I have been seriously missing out by not participating, and gosh some of these bloggers make beautiful cakes.
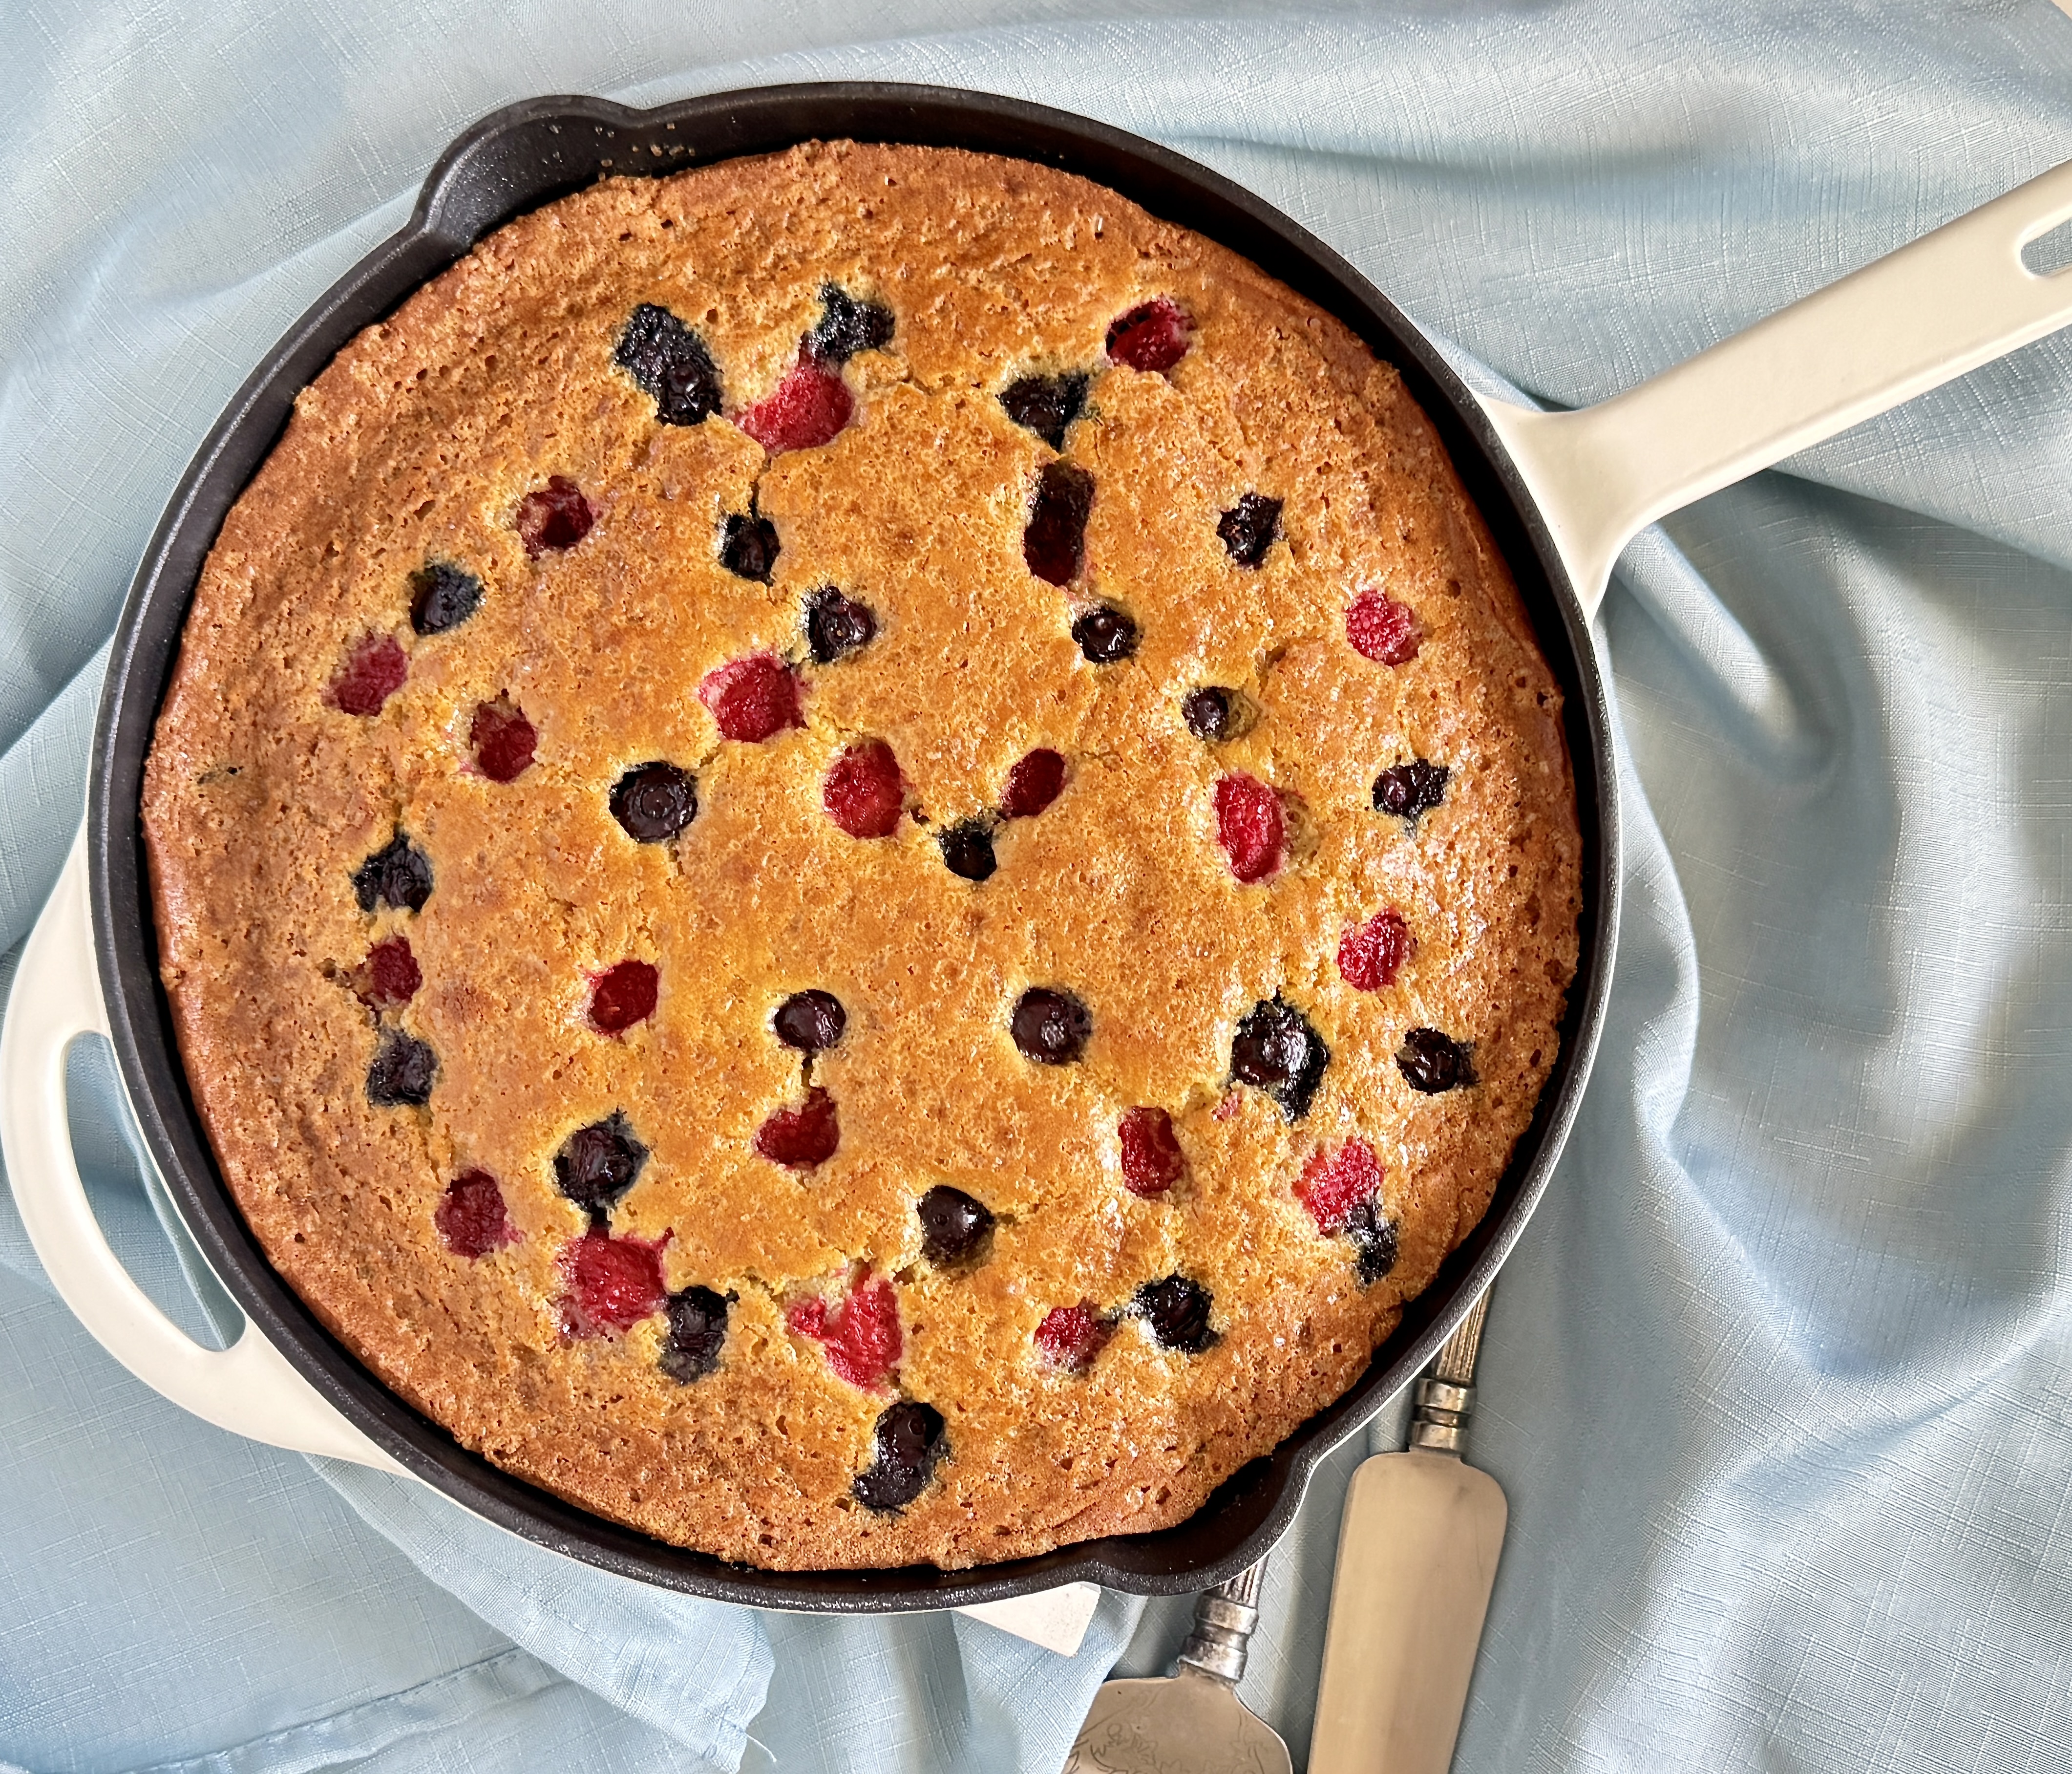
The theme for the month of May is berries which was perfect. I have been on a real raspberry kick at the moment, having recently made some Razzleberry Crumbs Bars, and I still had some in the fridge ready for my next baking adventure. Making a bundt seemed meant-to-be since I had recently borrowed Pure Vanilla from our local library and bookmarked the Vanilla Twinkie Bundt Cake as something I really wanted to try. Pairing raspberries with it seemed the natural thing to do for this month's Bundt-a-Month theme.
A tunnel of marshmallow cream runs through the middle of the bundt - #BundtaMonth |
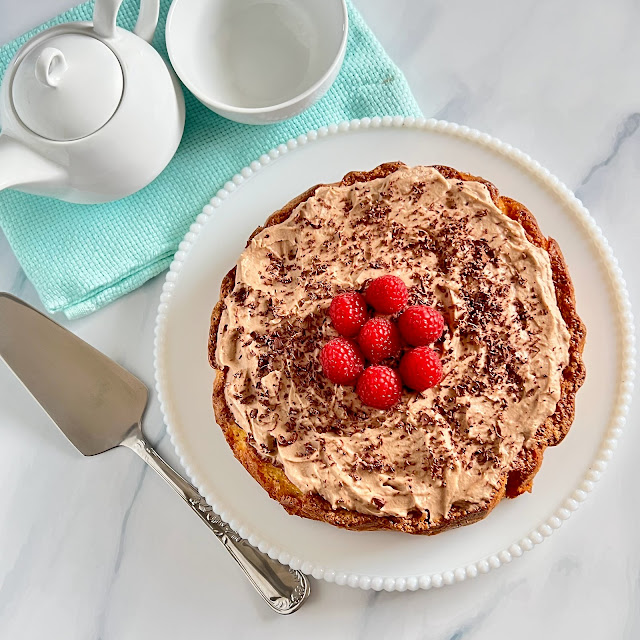
Whilst I loved the tartness of the raspberries against the sweetness of the cake, I did have a few problems with this cake. I thought that 2 cups of sugar was quite a lot considering the cake has a marshmallow filling, so I cut it back to 1½, but I honestly think that you could easily remove another ½ cup and it would still be sweet enough. Also, after I added the oil I had a lot of trouble getting the mixture to get to the stage of "light and fluffy". I finally settled for incorporated and creamy, but this did not seem to have an adverse effect on the cake. Finally I had problems with filling the cake, part of which was my fault for not waiting for it to fully cool. I used a cupcake corer to make the holes, but maybe I should have used an apple corer to make smaller holes because there was no way that I had enough filling for the cake. I quickly made up a second batch of marshmallow filling and this seemed to be perfect - note that I have doubled the quantity in the recipe below. The only other change I made was to use vanilla bean paste, rather than extract, because I really love vanilla and I like the little flecks it gives to baked goods. The first time I ever tried a Twinkie was when they were supposedly disappearing forever, and I thought it was now or never. If you are a Twinkie fan then this is the bundt for you, as it perfectly mimics the flavor profile - well maybe it did a little better before I added the raspberries - but I really did like the addition of them in the cake.
Vanilla Twinkie Bundt Cake with Raspberries - it is hot here so the filling started to puddle |
Vanilla Twinkie Bundt Cake with Raspberries
(Printer Friendly Recipe)
Ingredients
Cake ~
- 3 cups cake flour
- 1 tablespoon baking powder
- ¾ teaspoon salt
- 6 tablespoons unsalted butter, at room temperature
- 1 tablespoon vanilla bean paste
- 1½ cups granulated sugar
- ½ cup vegetable oil
- 3 large eggs plus 4 large egg yolks, at room temperature
- 1 cup buttermilk, at room temperature
- 2 cups fresh or frozen raspberries
- 2 (7.5 ounce) jars marshmallow creme
- 1 cup (2 sticks) unsalted butter, at room temperature
- 2 teaspoons pure vanilla bean oaste
- Confectioners' sugar, for dusting (optional)
Preparation
Cake ~
- Position rack in the lower third of the oven and preheat oven to 325°F.
- Coat a 12-cup Bundt pan with nonstick cooking spray and dust it lightly with flour.
- Sift together the flour, baking powder, and salt into a large bowl.
- In the bowl of a stand mixer fitted with the paddle attachment, beat butter and vanilla extract on medium speed until smooth and creamy.
- Add sugar and beat until evenly mixed, about 1 minute.
- Slowly pour in oil. Beat until light and fluffy, about 2 minutes.
- Add eggs and egg yolks, 1 at a time, beating thoroughly after each addition.
- Reduce mixer speed to low and add flour mixture and buttermilk in three alternating additions, ending with the buttermilk, and continue to mix on low speed until the batter is smooth and no lumps remain.
- Turn off mixer and fold batter several times by hand to ensure everything is well incorporated.
- Add raspberries and gently fold until incorporated, and then add to prepared pan.
- Bake for 60 to 70 minutes, until the cake is golden, the top springs back when lightly pressed, and a cake tester inserted into the center comes out clean.
- Place pan on a wire rack and let cool completely, about 2 hours.
Filling ~
- In the bowl of a stand mixer, beat together marshmallow creme, vanilla, and butter until smooth. Transfer to a pastry bag fitted with a large round tip.
- With the cake still in the pan, use a paring knife or apple corer to cut 6 or 7 deep holes into the bottom of the cake, each about 3/4 inch in diameter; be careful not to cut through top of cake. Discard (i.e., nibble) cake scraps. With your fingers, gently burrow a horizontal tunnel around the center of the cake, connecting the vertical holes.
- Insert the tip of the pastry bag into each hold and squeeze in filling, tilting pastry bag back and forth as you work to encourage filling into the horizontal tunnel through the cake. When cake is filled, use a spatula to scrape away excess filling from the bottom of the cake. Quickly and carefully invert cake onto serving platter. Dust with confectioners' sugar, if desired, and serve.
Recipe adapted from Pure Vanilla by Shauna Sever.
Labels:
baking,
baking blog,
berries,
bundt,
bundtamonth,
buttermilk,
cake,
cookbook,
Pure Vanilla,
raspberry,
Twinkie,
vanilla
July 04, 2011
Red, White & Blue Waffles
Happy 4th of July! Hope you all have a wonderful day that includes family, friends, fun, fireworks and lots of yummy food.
We decided to start our morning off with some patriotic red, white and blue waffles. It was a little bit of a mad rush because I also needed to get the baked beans into the slow cooker (recipe to come a little later). In a very short amount of time I managed to use a good number of bowls, measuring spoons, pots, and utensils. Usually I try to clean as I go but that wasn't an option this morning. Luckily for me a magic genie appeared and washed up everything for me. Well, really it was my wonderful husband, but it was magical. In between doing this he also whipped up a White Sangria (another recipe to follow soon), and had it in the fridge to chill.
These waffles were inspired by ones that appeared on Kita's blog, Pass the Sushi. Her post made me laugh because it was entitled "Blueberry Sour Cream Waffles for When Gerard Butler Visits". The waffles sounded amazing, and who doesn't want an amazing recipe when someone like Gerard visits? I mean you have to be ready don't you?
My refrigerator contained a plethora of berries - blackberries, blueberries, strawberries, and raspberries - but I decided to use blueberries and raspberries for my waffles. I used only all-purpose flour, mainly because I did not have any whole wheat pastry flour, and I added some cinnamon to the mix. A little dusting of powered sugar gave them the red, white, and blue look. I do agree with Kita that a dollop of cream, or even sour cream, would make an excellent addition but these were gobbled up too quickly to do so today. All that accompanied them was some maple syrup.
I wanted to pass on a tip for transferring the batter to the waffle maker. I have always used the little cup that came with the waffle maker. It holds about one cup, but it is always difficult to get all of the batter out of it. Previously I have resorted to using a mini spatula to scrape the sides as I pour the batter into the waffle maker. This morning I decided to grab my largest ice cream scoop and measure how many scoops equaled the amount of batter in the cup. It worked out to two full scoops. I cannot tell you how much easier it is to use an ice cream scoop to transfer the batter, and the built in scraper means that all of the batter is transferred with a squeeze of the handle.
Red, White, & Blue Waffles
(Printer Friendly Recipe)Ingredients
- 2 cups all-purpose flour
- 1½ teaspoons baking powder
- 1 teaspoon baking soda
- ½ cinnamon
- ½ teaspoon salt
- 1 cup sour cream
- 1 cup whole milk
- 3 eggs
- 8 tablespoons butter, melted and cooled
- ¾ cup blueberries
- ¾ cup raspberries
Preparation
- Preheat your waffle iron on medium-high heat.
- In a large bowl, combine flour, baking powder, baking soda, and salt.
- In a smaller bowl, whisk together the milk and sour cream, and then whisk in the eggs.
- Pour the wet ingredients into the dry, and stir just until combined.
- Fold in the butter, and then the blueberries and raspberries, stirring minimally.
- Pour 1/4 cup of batter per waffle onto the iron and cook until the waffles are a light golden brown. Keep cooked waffles warm on a platter in the oven.
- Serve waffles with a dusting of powdered sugar and maple syrup (a dollop of whipped cream or sour cream would be great too).
- Makes approximately 6 waffles.
Labels:
baking,
batter,
blueberry,
breakfast,
maple syrup,
raspberry,
sour cream,
waffles
May 31, 2011
To Try Tuesday - Mixed Berry Buckle
When I first saw the recipe for a Blueberry Buckle over at Tracey's Culinary Adventures I knew that I had to make it soon. Like Tracey I had never made a buckle before, and her cake just looked so enticingly full of blueberries. In the fridge there was a punnet of blueberries, but I also had some raspberries so I decided to make a mixed berry buckle. I am so glad I pushed it to the top of my To Try list.
A buckle is a is a type of rich, dense cake with a moist crumb which is sometimes compared to coffee cake. It is made in a single layer with berries added to the batter and has a topping that is similar to a streusel, which gives it a buckled or crumpled appearance.
In a world where there is a huge emphasis on perfection there is something comforting about a cake that has a crumpled appearance. It makes no apologies and is happy just the way it is, and so it should be. Both warm from the oven, and cold the next day this cake was delicious. The tartness of the berries played so well against the sweetness of the cake, that everyone kept going back for just another small piece.
Growing up, coffee cakes were not very popular in my household. We tended to have more loaf or pound cake, and sometimes, pie. When I moved to the United States I was amazed that donuts, waffles, pancakes, and even coffee cake were also considered breakfast items. My mind could hardly comprehend that the very things I had always though of as dessert could also be breakfast. A whole new world opened up for me. I am looking forward to making this buckle again soon, and maybe this time there will actually be some left for breakfast the next morning.
This buckle is not the only thing that I have enjoyed from Tracey's site. She has so many good things going on over there - including her latest posts for Southwestern Black Bean Salad, Margarita Cupcakes, and Grilled Romaine with Blue Cheese-Bacon Vinaigrette. If you aren't familiar with her site, Tracey's Culinary Adventures, I highly recommend that you check it out soon.
Mixed Berry Buckle
(Printer Friendly Recipe)
Ingredients
Streusel
- ½ cup all-purpose flour
- ½ cup packed light brown sugar
- 2 tablespoons granulated sugar
- ¼ teaspoon ground cinnamon
- pinch salt
- 4 tablespoons unsalted butter, cut into 8 pieces & softened
Cake
- 1½ cups all-purpose flour
- 1½ teaspoons baking powder
- 10 tablespoons unsalted butter, softened
- ⅔ cup granulated sugar
- ½ teaspoon salt
- ½ teaspoon lemon zest
- 1½ teaspoons vanilla extract
- 2 large eggs, at room temperature
- 2 cups fresh blueberries
- 2 cups fresh raspberries
Preparation
Streusel
- In the bowl of a stand mixer fitted with the paddle attachment, beat the flour, both sugar, cinnamon and salt on low to combine and break up any brown sugar lumps.
- With the mixer still on low, add the butter and beat until it is completely incorporated into the dry ingredients, about 2-3 minutes - the mixture will resemble wet sand.
- Transfer the streusel to another bowl and set aside.
Cake
- Preheat oven to 350°F with a rack in the lower third of the oven.
- Line the bottom of a 9-inch round pan with a round of parchment, then spray the parchment and the pan with nonstick cooking spray with flour.
- In a small bowl, whisk the flour and baking powder together then set aside.
- In the bowl of a stand mixer fitted with the paddle attachment, beat the butter, sugar, salt and lemon zest at medium speed until light and fluffy, about 3-4 minutes, stopping to scrape down the sides of the bowl as necessary.
- Beat in the vanilla.
- Add the eggs, on at a time, beating well after each addition.
- With the mixer on low, gradually add the flour mixture, beating until just about incorporated.
- Remove the bowl from the mixer and use a rubber spatula to finish stirring - the batter will be very thick. Gently fold in the blueberries and raspberries.
- Transfer the batter to the prepared pan; spread in an even layer.
- To top with the streusel - pick up a handful of streusel and squeeze to form a clump. Break this large clump into smaller pieces and sprinkle over the batter. Continue until you've used all of the streusel.
- Bake for about 55 minutes, or until the streusel is golden brown and a toothpick inserted in the center comes out clean.
- Transfer pan to a wire rack and cool for 15-20 minutes.
- Run a thin knife around the edges of the cake then invert it onto the rack.
- Remove the parchment then turn the cake streusel side up and let cool on the wire rack.
February 28, 2011
Hibiscus-Raspberry Ice Cream
A few months ago my husband purchased a Hibiscus-Raspberry Tisane from Coffees of Hawaii. This was something new for me because I had never even heard of a tisane before. A little internet research on Wikipedia revealed that a tisane is "a herbal infusion made from anything other than the leaves of the tea bush".
Since the tisane has to infuse the ice cream base, you will need to allow time for this, before you can enjoy the ice cream. I started early in the morning and let the mixture sit in the refrigerator all day, before adding it to my ice cream maker. Next time I might even let it sit all night just to get all of that wonderful flavor fully integrated into the base.
This is one of those ice creams that will leave people guessing. They probably won't be able to pinpoint the exact flavor. You get a hint of raspberry and a taste of sweetness, and of course that vanilla cream base. All of it combines to make a deliciously-flavored ice cream.
The possibilities are endless for flavoring this ice cream. I was thrilled to see that Coffees of Hawaii also have tisanes in the following flavors - Coffee Cherry, Papaya Leaf Vanilla, Mamaki Ginger, Jasmine Blossom, and Lavender. Even if one of these flavors did not grab your attention you could could certainly make up your own blend.
Hibiscus Raspberry Ice Cream©
(Printer Friendly Recipe)
Ingredients
- 2 cups heavy cream
- 1 cup whole milk
- 1/2 cup sugar
- 1/8 teaspoon salt
- 3 vanilla beans, split lengthwise (or 2 teaspoons vanilla bean paste)
- 2 large eggs
- 3 teaspoons of Hibiscus Raspberry Tisane (or flavor of your choice)
Preparation
- Combine cream, milk, sugar, and salt in a heavy saucepan.
- Scrape seeds from vanilla beans with tip of a knife into cream mixture, then drop in pods.
- Heat cream mixture just to a boil.
- Whisk eggs in a large bowl, then add hot cream mixture in a slow stream, whisking.
- Pour mixture into saucepan and cook over moderately low heat, stirring constantly, until slightly thickened and registers 170°F on thermometer (do not let boil).
- Pour custard through a fine-mesh sieve into a clean metal bowl.
- Add tisane and mix thoroughly to combine, and then cool, stirring occasionally.
- Chill, covered, until cold, at least 3 hours.
- Freeze custard in an ice cream maker.
- Transfer to an airtight container and put in freezer.
Subscribe to:
Posts (Atom)