
Showing posts with label berries. Show all posts
Showing posts with label berries. Show all posts
December 20, 2024
Lemony Half Pound Cake ~#TheCakeSliceBakers
A lemony half-pound cake is a moist, dense, and buttery cake with a bright, zesty lemon flavor. The "half-pound" refers to the traditional balance of ingredients - typically a pound each of butter, sugar, eggs, and flour - but in this case, the proportions are adjusted to create a lighter, more delicate texture while still maintaining a rich flavor.


December 20, 2021
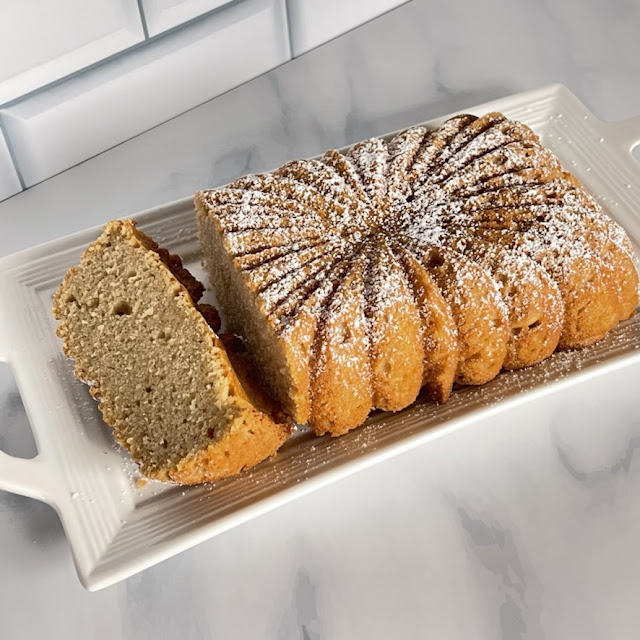
Lemon-Sour Cream Pound Loaf ~ #TheCakeSliceBakers
Lemon is such a classic cake flavor and is great at any time of the year. This pound cake is flavored with lemon juice
and lemon zest, and can be topped with powdered sugar or a tangy glaze for an extra punch.
May 20, 2019
Kladdkaka-Sticky Chocolate Cake ~ #TheCakeSliceBakers
If it were easy to resist, it would not be called chocolate cake.

February 16, 2017
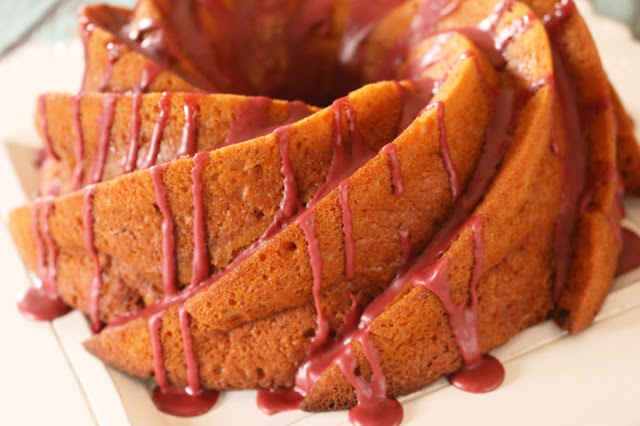
Berry UpBeet Bundt Cake - #BundtBakers
The theme for #BundtBakers this month is Red, which could be incorporated as the bundt cake batter, the drizzle or frosting, a filling or decorations. We were challenged to be creative but think RED.

April 17, 2014
Bursting-With-Berries Lemon Curd Bundt Cake ~ #BundtBakers

I still haven't found a way to make this year slow down, so if you have any tricks please let me know. Here we are in the middle of April and Easter is almost here, so it is very fitting that our theme for #BundtBakers this month is Easter!
May 14, 2013
Vanilla Twinkie Bundt Cake with Raspberries - #BundtaMonth

Who doesn't love a good bundt? There are so many different flavors and absolutely beautiful bundt pans to choose from, that it is always exciting to make one. It would be very easy for me to start a bundt pan collection if only I had the room to store them all. They can be classic or extremely intricate, but all produce beautiful cakes.
Over the past few months I noticed that Laura from The Spiced Life participates in a blogging event called #Bundt-a-Month, which is the of creation of Baker Street and Cake Duchess. Each month a theme or a particular ingredient(s) is chosen for the month, and then everyone gets to create a beautiful bundt. I went to check out some of these cakes and I realized two things - I have been seriously missing out by not participating, and gosh some of these bloggers make beautiful cakes.
The theme for the month of May is berries which was perfect. I have been on a real raspberry kick at the moment, having recently made some Razzleberry Crumbs Bars, and I still had some in the fridge ready for my next baking adventure. Making a bundt seemed meant-to-be since I had recently borrowed Pure Vanilla from our local library and bookmarked the Vanilla Twinkie Bundt Cake as something I really wanted to try. Pairing raspberries with it seemed the natural thing to do for this month's Bundt-a-Month theme.
 |
| A tunnel of marshmallow cream runs through the middle of the bundt - #BundtaMonth |
Whilst I loved the tartness of the raspberries against the sweetness of the cake, I did have a few problems with this cake. I thought that 2 cups of sugar was quite a lot considering the cake has a marshmallow filling, so I cut it back to 1½, but I honestly think that you could easily remove another ½ cup and it would still be sweet enough. Also, after I added the oil I had a lot of trouble getting the mixture to get to the stage of "light and fluffy". I finally settled for incorporated and creamy, but this did not seem to have an adverse effect on the cake. Finally I had problems with filling the cake, part of which was my fault for not waiting for it to fully cool. I used a cupcake corer to make the holes, but maybe I should have used an apple corer to make smaller holes because there was no way that I had enough filling for the cake. I quickly made up a second batch of marshmallow filling and this seemed to be perfect - note that I have doubled the quantity in the recipe below. The only other change I made was to use vanilla bean paste, rather than extract, because I really love vanilla and I like the little flecks it gives to baked goods. The first time I ever tried a Twinkie was when they were supposedly disappearing forever, and I thought it was now or never. If you are a Twinkie fan then this is the bundt for you, as it perfectly mimics the flavor profile - well maybe it did a little better before I added the raspberries - but I really did like the addition of them in the cake.
 |
| Vanilla Twinkie Bundt Cake with Raspberries - it is hot here so the filling started to puddle |
Vanilla Twinkie Bundt Cake with Raspberries
(Printer Friendly Recipe)
Ingredients
Cake ~
- 3 cups cake flour
- 1 tablespoon baking powder
- ¾ teaspoon salt
- 6 tablespoons unsalted butter, at room temperature
- 1 tablespoon vanilla bean paste
- 1½ cups granulated sugar
- ½ cup vegetable oil
- 3 large eggs plus 4 large egg yolks, at room temperature
- 1 cup buttermilk, at room temperature
- 2 cups fresh or frozen raspberries
- 2 (7.5 ounce) jars marshmallow creme
- 1 cup (2 sticks) unsalted butter, at room temperature
- 2 teaspoons pure vanilla bean oaste
- Confectioners' sugar, for dusting (optional)
Preparation
Cake ~
- Position rack in the lower third of the oven and preheat oven to 325°F.
- Coat a 12-cup Bundt pan with nonstick cooking spray and dust it lightly with flour.
- Sift together the flour, baking powder, and salt into a large bowl.
- In the bowl of a stand mixer fitted with the paddle attachment, beat butter and vanilla extract on medium speed until smooth and creamy.
- Add sugar and beat until evenly mixed, about 1 minute.
- Slowly pour in oil. Beat until light and fluffy, about 2 minutes.
- Add eggs and egg yolks, 1 at a time, beating thoroughly after each addition.
- Reduce mixer speed to low and add flour mixture and buttermilk in three alternating additions, ending with the buttermilk, and continue to mix on low speed until the batter is smooth and no lumps remain.
- Turn off mixer and fold batter several times by hand to ensure everything is well incorporated.
- Add raspberries and gently fold until incorporated, and then add to prepared pan.
- Bake for 60 to 70 minutes, until the cake is golden, the top springs back when lightly pressed, and a cake tester inserted into the center comes out clean.
- Place pan on a wire rack and let cool completely, about 2 hours.
Filling ~
- In the bowl of a stand mixer, beat together marshmallow creme, vanilla, and butter until smooth. Transfer to a pastry bag fitted with a large round tip.
- With the cake still in the pan, use a paring knife or apple corer to cut 6 or 7 deep holes into the bottom of the cake, each about 3/4 inch in diameter; be careful not to cut through top of cake. Discard (i.e., nibble) cake scraps. With your fingers, gently burrow a horizontal tunnel around the center of the cake, connecting the vertical holes.
- Insert the tip of the pastry bag into each hold and squeeze in filling, tilting pastry bag back and forth as you work to encourage filling into the horizontal tunnel through the cake. When cake is filled, use a spatula to scrape away excess filling from the bottom of the cake. Quickly and carefully invert cake onto serving platter. Dust with confectioners' sugar, if desired, and serve.
Recipe adapted from Pure Vanilla by Shauna Sever.

March 15, 2011
To Try Tuesday - Bill's Berry Tart

Math never was my strong point so it is no big surprise that I missed Pi Day. I had this great idea that I would make Bill Granger's Cherry Tart to celebrate Pi Day (even though it is, technically, a tart not a pie) but I ended up having 3.14159265 other things to do, so it became a To Try recipe instead.

I planned on using cherries but Costco did not have any and I didn't want to be stuck with a big bag of frozen cherries. So I went with blueberries instead, using about 2 cups of whole berries to make a single layer in the tart shell. It therefore became Bill's Berry Tart.
 |  |
 |  |
There is not one thing about this tart that I would change - it was amazing. If you are looking for a easy-to-make dessert that will impress your family and friends then this is your dessert. Cherries, blueberries, blackberries, raspberries, or even a mix of berries would be great in the filling. I loved that the crust was a cinch to make and it did not have to be rolled out. You know how the crust can shrink sometimes when you are pre-baking? Not with this one. Also, those pie weights that you use to stop air pockets forming in the crust? Well, you will not need them for this crust. Simply make crust in less than 5 minutes, pre-bake, fill with fruit, pour custard over the top, and bake once more. Mine baked for 35 minutes, so realistically you could have this pie ready in about an hour. I sprinkled mine with a little powdered sugar after it cooled, but this is optional. Ice cream or whipped cream would be a nice addition too. Lastly, the original recipe was in metric, so if you prefer these measurements you can find the recipe here.

Bill’s Berry Tart
(Printer Friendly Version)Ingredients
Pastry
- ½ cup (1 stick) + 1 tablespoon unsalted butter, melted and cooled
- ⅓ cup sugar
- 1¼ cups all-purpose flour
- a pinch of salt
- 2 tablespoons of ground almonds
Filling
- ⅔ cup cream
- 2 eggs, lightly beaten
- 2 teaspoons vanilla extract
- 3 tablespoons sugar
- 2 tablespoons all-purpose flour
- 16 oz cherries, halved and pitted
- Preheat oven to 350°F.
- Grease a 9-inch round loose-bottomed tart tin.
To make the pastry:
- Stir together the butter and sugar in a large mixing bowl.
- Add the flour and salt and stir to make a soft dough.
- Press dough evenly into base and side of tart tin with fingertips.
- Put the tin on a baking tray and bake for 12-15 mins, until pastry is slightly puffy.
- Remove from oven and sprinkle almond meal over base.
To make filling:
- Whisk together cream, eggs, vanilla, sugar.
- Add flour and whisk until well mixed.
- Arrange cherries over pastry base and pour cream filling over cherries.
- Bake for 40-50 minutes until filling is firm.
- Leave to cool and serve with cream or ice-cream.
Serves 8-10. Original recipe appears in Holiday by Bill Granger.

Subscribe to:
Posts (Atom)