If you love coconut, then this is the cake for you. Three layers of light, tender, and moist coconut cake,
covered with creamy coconut buttercream and topped with toasted fresh coconut shavings.

The Cake Slice Bakers are officially at the half way mark of baking through Zoë Bakes Cakes by Zoē François. This book has so many cake choices with various levels of difficulty - Bundt cakes, quick breads, layered cakes, rolled and fancy cakes just to name a few. And for those who have not heard of Zoē François she is an amazing baker and bestselling author, blogger, and has a series called Zoë Bakes on the Magnolia Network. I have been really enjoying this cake-centric cookbook.

The Cake Slice Bakers are a group of dedicated bakers who all love cake. Each year we choose a new cake-centric cookbook and bake our way through it. Every month we are given 3 choices and on the 20th day of each month we reveal what we have chosen on our blogs. This month's choices were Coconut Cream Cake, The OG Snack Cake, and Greek Orange-Phyllo Cake. I was feeling in the mood for a delicious Coconut Cream Cake, with a few little twists.

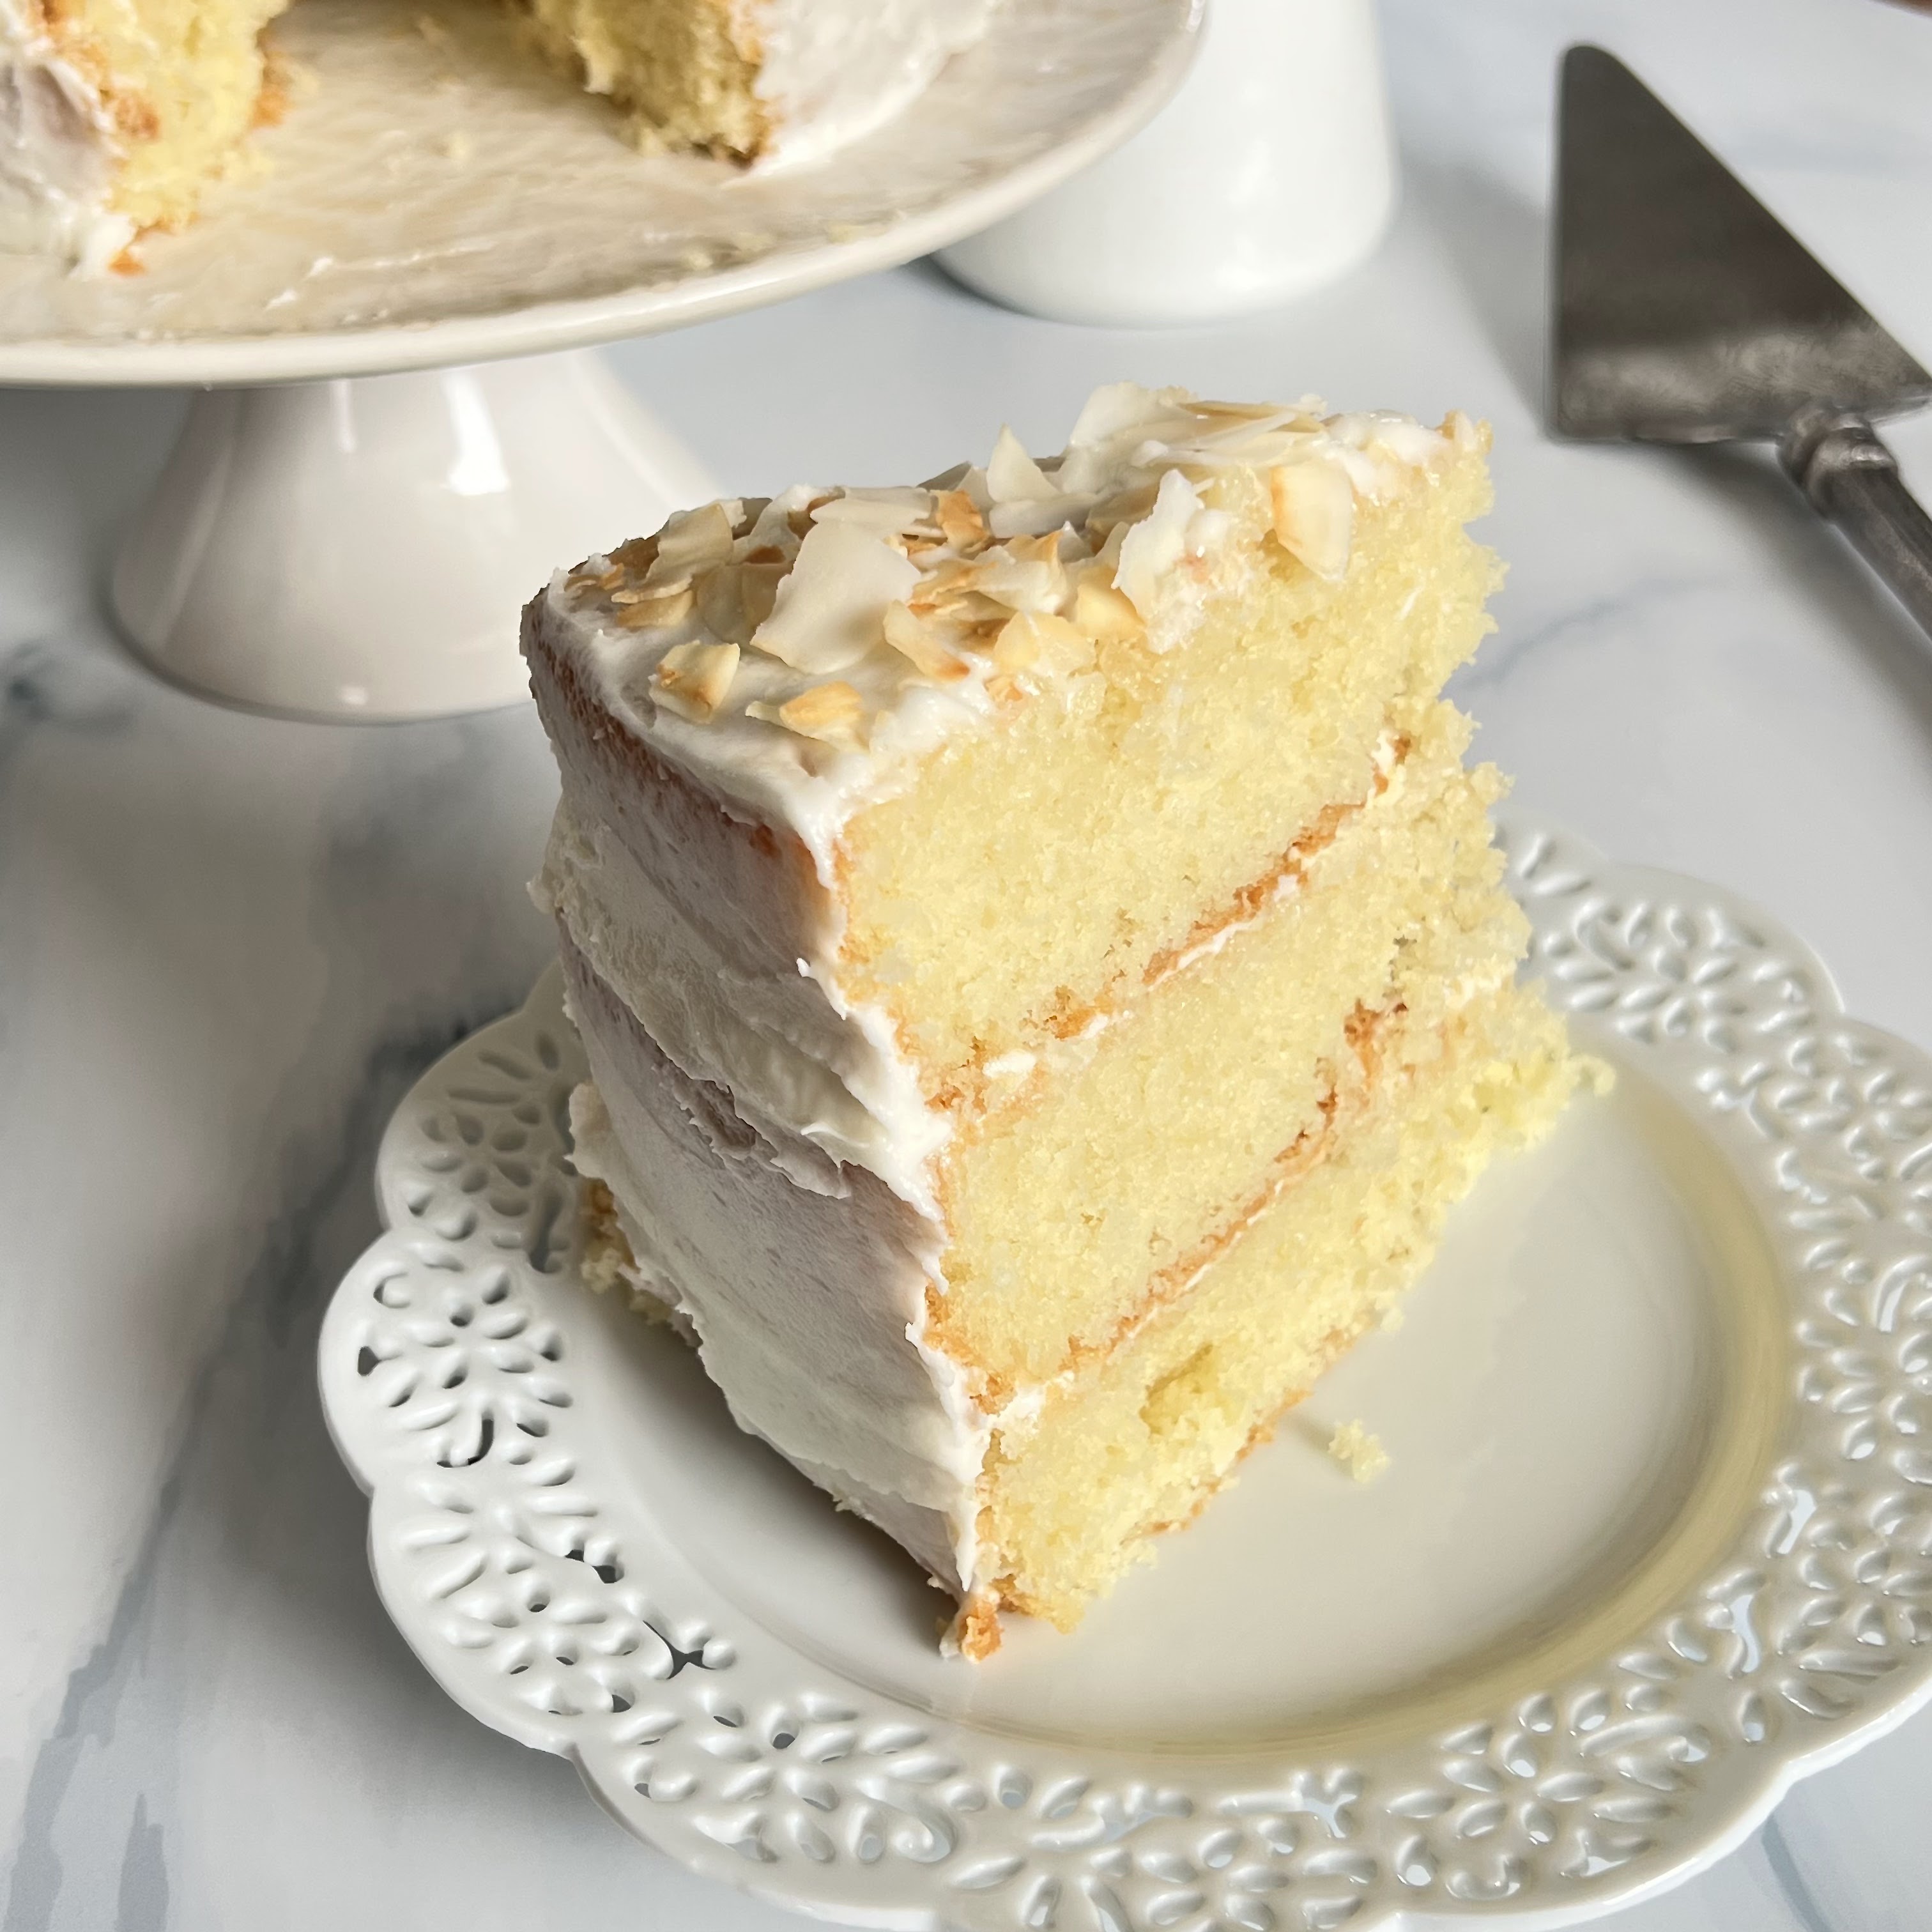
The three layers of coconut sponge cake are absolutely delicious (I made my cake with Kara Coconut Cream instead of coconut milk). To make the cake come together I decided to make a coconut cream buttercream which I added between each layer and then used just enough on the top and outside to make it a naked cake. Some toasted fresh coconut shavings on top added the finishing touch. This was so onolicious, but I do want to try it again so that I can try the coconut pastry cream.

Coconut Cream Cake
Ingredients
Cake ~
Fluffy Swiss Meringue Topping ~
Preparation
Cake ~

Each month The Cake Slice Bakers are offered a selection of cakes from the current book we are baking through. This year it is Zoë Bakes Cakes by Zoē François. We each choose one cake to bake, and then on the 20th - never before - we all post about our cake on our blogs. There are a few rules that we follow, but the most important ones are to have fun and enjoy baking & eating cakes!
Follow our Facebook, Instagram, and Pinterest pages where you can find all of our cakes, as well as inspiration for many other cakes. You can also click on the links below to take you to each of our cakes. If you have a blog and are interested in joining The Cake Slice Bakers and baking along with us, please send an email to thecakeslicebakers at gmail dot com for more details.
The Cake Slice Bakers also have a new Facebook group called The Cake Slice Bakers and Friends. This group is perfect for those who do not have a blog but want to join in the fun and bake through this book.
Coconut Cream Cake
The OG Snack Cake
Greek Orange-Phyllo Cake

- 200g (2 cups) loosely packed sweetened shredded coconut
- 115g (8 tablespoons) unsalted butter, at room temperature
- 450g (2¼ cups) granulated sugar
- 80ml (⅓ cup) vegetable oil
- 1 tablespoon vanilla extract
- 1½ teaspoons coconut extract
- 4 eggs room temperature
- 5 egg yolks at room temperature
- 280g (2⅓ cups) all-purpose flour
- 2¼ teaspoon baking powder
- ¾ teaspoon kosher salt
- 240ml (1 cup) unsweetened coconut milk, at room temperature
Coconut Pastry Cream ~
- 100g (1 cup) loosely packed sweetened coconut flakes
- 1 x 400ml (13.5-oz) can unsweetened coconut milk
- 100g (½ cup) granulated sugar, divided
- 1 pinch kosher salt
- Seeds scraped from ½ vanilla bean or 1 teaspoon vanilla extract
- ¼ teaspoon coconut or almond extract
- 2 tablespoons cornstarch
- 3 egg yolks at room temperature
- 2 tablespoons unsalted butter
- 80ml (⅓ cup) heavy whipping cream, whipped to stiff peaks
- 360ml (1½ cups) egg whites (about 7 eggs), at room temperature
- 600g (3 cups) granulated sugar
- 1 pinch kosher salt
- 2 teaspoons vanilla extract
Preparation
Cake ~
- Preheat the oven to 175℃ (350℉).
- Generously grease 3 x 20cm (8-inch) cake pans, then line them with greased parchment paper.
- In a food processor, break up the long strands of shredded coconut by pulsing for about 30 seconds.
- In a stand mixer fitted with the paddle attachment, cream the butter on medium-high speed until creamy and smooth, about 1 minute.
- Turn the mixer speed to medium; add the sugar, oil, vanilla, and coconut extract; and beat for about 5 minutes, until the mixture is light in color and about double in volume.
- Turn the speed to medium-low and add the eggs and egg yolks, one at a time, mixing each until incorporated before adding the next, scraping the bowl after each addition.
- In a separate bowl, whisk together the flour, baking powder, and salt until well combined.
- Add one-third of the flour mixture to the butter mixture and mix just until combined.
- Add half of the coconut milk, mixing until incorporated.
- Repeat with another one-third flour, the remaining coconut milk, and then finish with the final one-third flour, scraping the bowl and paddle after each addition.
- Fold in shredded coconut.
- Pour the batter into the prepared pans and spread evening using a small offset spatula.
- Gently tap the pans on the counter several times to release excess air bubbles.
- Bake until a tester comes out clean, about 35 minutes.
- Let the cakes cool completely before removing from the pans.
- Remove the parchment paper and place one cake layer on a serving plate.
Coconut Pastry Cream ~
- In a food processor, pulse the coconut flakes about 10 times to slightly break up the strands; set aside.
- In a medium saucepan over medium heat, combine the coconut milk, 50g (¼ cup) of the sugar, salt, vanilla, and coconut extract and cook, stirring, until it simmers.
- In a medium bowl, whisk together the cornstarch and remaining 50g (¼ cup) sugar.
- Add the egg yolks and whisk into a smooth paste.
- Whisk enough of the hot milk, a little at a time, into the egg mixture until it is warm to the touch.
- Once the eggs are tempered, pour the mixture back into the remaining milk in the pan.
- Return the saucepan to medium-high heat and bring the mixture to a boil; continuously whisk for 3 minutes more or the pastry cream will separate once it cools.
- After 3 minutes, whisk in the butter and coconut flakes.
- Pour the pastry cream into a shallow container and cover with plastic wrap, pressed directly onto the surface, to prevent a skin from forming.
- In a large bowl, add enough ice cubes and cold water to create a bath for the container to sit in without the water breaching the sides.
- Set the container in the ice bath or place in the freezer until chilled, about 15 minutes before using (or transfer to an airtight container and store in the refrigerator for up to 3 days).
- Stir the pastry cream to loosen, then mix in one-third of the whipped cream to lighten and fold in the remaining whipped cream.
- Using an offset spatula, spread half of the pastry cream over the cake; making sure not to go all the way to the edge.
- Top with the next cake layer and gently press down on the cake to make sure it is sitting snugly on the pastry cream.
- Spread with the remaining pastry cream and top with the final cake layer (if the pastry cream goes beyond the edge, clean it up with a metal decorating spatula).
- Make sure the layers are straight and cover with plastic wrap and refrigerate for about 1 hour to to set the pastry cream.
Fluffy Swiss Meringue Topping ~
- In a medium saucepan over medium-low heat, bring 2.5cm (1-inch) of water to a simmer.
- In the bowl of a stand mixer, combine the egg whites, sugar and salt; place over the simmering water; and stir with a rubber spatula until the mixture is hot and all of the sugar has dissolved, about 5 minutes.
- Remove the bowl from the heat and place onto the stand mixer fitted with the whisk attachment, then beat on high speed until very thick and glossy and stiff peaks form, about 5 minutes.
- If the meringue is not stiff enough, your spikes will slouch and lose the drama. Add the vanilla and mix well.
- Use immediately.
Assemble the Rest of the Cake ~
- Reserve 60g (1 cup) of the meringue topping.
- Use a metal spatula to spread a thick layer of the remaining meringue evenly over the cake.
- Take a blob—yes, a blob—of the reserved meringue between your fingers and press it against the meringue on the cake. Pull the blob away from the cake, it will break off in a wispy curl (the thicker the blob you lay down as a foundation on the cake, the bigger the curls will be, it may take a few times to get the hang of it, but persevere).
- Once you have the cake fully set with the curls, hold a kitchen blowtorch about 7.5cm (3-inches) from the cake, so just the tip of the flame is hovering over the cake.
- Keep the torch moving so it doesn’t burn the meringue.
- The tips of the curls will set fire, so blow them out as you go (the burnt tips are a lovely contrast and add a wonderful flavor).
- Serve the cake immediately or store in the refrigerator, covered, for up to 2 days.

Follow our Facebook, Instagram, and Pinterest pages where you can find all of our cakes, as well as inspiration for many other cakes. You can also click on the links below to take you to each of our cakes. If you have a blog and are interested in joining The Cake Slice Bakers and baking along with us, please send an email to thecakeslicebakers at gmail dot com for more details.
The Cake Slice Bakers also have a new Facebook group called The Cake Slice Bakers and Friends. This group is perfect for those who do not have a blog but want to join in the fun and bake through this book.
Coconut Cream Cake
The OG Snack Cake
Greek Orange-Phyllo Cake

I think I would prefer your version as well. Light icing is perfect for my taste.
ReplyDeleteLooks delicious and super classy.
ReplyDeleteGorgeous, simply beautiful!
ReplyDeleteHello,
ReplyDeleteI absolutely love coconut cake and plan to bake this recipe. I have a question about the vegetable oil quantity. In the ingredients it says 180 mls (1/3 cup), which is not accurate. 1/3 cup is 80 mls.
Can you please let me know whether it is 1/3 cup (80mls) or 180 mls (3/4 cup).
I have been following your blog for a long time, and always excited when you post a new recipe. I am also Australian and feel a bond given you are an expat.
Thanks for sharing so many wonderful cakes with the world. It is greatly appreciated.
Regards from Brisbane,
Angela
Aloha Angela, thanks for catching that typo in the recipe and it should say 80ml vegetable oil and I've updated the recipe. So nice to to hear from a fellow Aussie and I am thrilled you have been following my adventures in baking.
Delete