October 03, 2010

(P)Aarti Time - Sloppy Bombay Joes

The Food Network's most recent season of "The Next Food Network Star" produced it's share of both standouts and those not quite ready for their moment in the spotlight.  I really went back and forth as to who I wanted to win - Aarti Sequeira or Brad Sorenson.  In the end Aarti made it to the final three and was the big winner.

Her new show Aarti Party premiered a few weeks ago and has already proven to be a big hit.  It has already been renewed for another season, starting in December.  I have been tuning in and find Aarti to be very entertaining and her idea of an Indian twist to everyday foods has been a winner.  I have actually saved a most of her recipes to try at a later date.


Her recipe for Sloppy Bombay Joes caught my attention.  Actually I think it caught a lot of people's attention as it has a five-star rating and, as of this post,  there are currently 562 reviews for the recipe.  I haven't made Sloppy Joes for a long time but the idea of adding Indian spices to the basic idea of a Sloppy Joe seemed very appealing.  I mostly followed the exact recipe, except for upping the
garam marsala a little bit and being cautious with the serrano chile. Unfotunately I also had to leave out the cilantro - I love it but the rest of the family does not.  I was really pleased with the results and it was a hit with the rest of my family.  You know it is a winner when even the leftovers are fought over.  Next time I am going to try the recipe with some MorningStar Crumbles, so that the vegetarians in my family can try it too.


Sloppy Bombay Joes 

(Recipe courtesy Aarti Sequeira 2010) 

Ingredients

Sauce

  • 2 tablespoons vegetable oil
  • 1 tablespoon minced ginger
  • 2 cloves garlic, minced
  • 1/2 serrano chile, seeded and finely minced (save the other half for the turkey)
  • 1 teaspoon garam masala
  • 1/2 teaspoon paprika
  • 1 (15-ounce) can tomato sauce
  • 1 cup water

Turkey

  • 3 to 4 tablespoons vegetable oil
  • Small handful shelled pistachios, about 1/4 cup
  • Small handful raisins, about 1/4 cup
  • 1 teaspoon cumin seeds
  • 1/2 large white onion, finely diced
  • 1 red bell pepper, seeds and membrane removed, finely diced
  • 1/2 serrano chile, seeds intact (don't chop it up unless you like things spicy!)
  • Kosher salt
  • 1 pound ground turkey
  • 1/2 teaspoon honey
  • 1/4 cup half-and-half
  • Small handful chopped fresh cilantro (soft stems included)
  • 4 to 6 hamburger buns

Directions

Begin by making the sauce
  1. Warm the oil in a medium saucepan over medium heat, until it shimmers. 
  2. Add the ginger, garlic and serrano pepper. Saute until the ginger and garlic brown a little. 
  3. Add the garam masala and paprika and saute for 30 seconds. 
  4. Stir in the tomato sauce and water. Bring to a boil, then reduce the heat and simmer, uncovered, until thickened, about 15 minutes.
 Meanwhile for the turkey
  1. In large skillet, warm 2 tablespoons of oil. When shimmering, add the pistachios and raisins. Cook until the raisins swell up and the pistachios toast slightly. Remove from the pan and set aside.
  2. Return the pan to medium heat, add 1 to 2 more tablespoons of oil, and warm until shimmering. 
  3. Add the cumin seeds and allow them to sizzle for about 10 seconds, or until some of the sizzling subsides. 
  4. Stir in the onions and bell pepper; saute until softened and starting to brown. Add the serrano pepper. Saute for another couple of minutes, seasoning with a little salt. 
  5. Stir in the turkey, breaking up the big lumps. Cook until opaque, about 5 minutes.

Meanwhile, your sauce should be ready
  1. Pour the sauce into the skillet with the turkey. Stir and bring to a boil, then lower the heat and simmer until the mixture has thickened slightly, about 10 minutes.
  2. Once the turkey is cooked and the sauce has thickened a little, remove the serrano pepper (unless you want to eat it whole, like my Dad does!). 
  3. Add the honey, half-and-half, pistachios and raisins. Stir through and taste for seasoning. 
  4. Before serving, garnish with fresh cilantro.
  5. Toast the buns, fill with the turkey mixture and serve. Eat (with your hands!) and enjoy!   

October 02, 2010

LiveSTRONG With A Taste of Yellow - Glazed Lemon Buttermilk Cake


Today, October 2, 2010 is LIVESTRONG day. Please take a moment to think about those who are facing this devastating disease, or who have lost someone to cancer.


Unfortunately cancer has touched someone in my life. It seems that these days almost everyone I come into contact with knows someone affected by cancer - whether it is at our school, the supermarket, the gym, or our neighborhood.  It is not surprising then to find out that this year, 2010, cancer has now become the leading cause of death worldwide.  It is also shocking to learn that 30 percent of cancers are preventable, and another one-third of cancers are treatable if detected early.  Please remind everyone you love (including yourself) to have their yearly screenings.  I dedicate my heart-themed photo to my sister-in-law Jennifer.


I have had this recipe printed out for a while and decided that this would be the perfect occasion to make it. I decided to create my own heart photo and a recipe as part of  LIVESTRONG With A Taste of Yellow. They had a few guidlelines that they wanted as to follow:

1. The photo must include a yellow food.
2. It must feature a heart in the photo - this could be food baked in a heart shape or food decorated with hearts.
3. Your heart photo must be created specifically for this LIVESTRONG With A Taste Of Yellow - Heart Series.
4. Please include a link to this post. It helps raise awareness of LIVESTRONG Day  

Not only did the cake turn out great it really made me stop and think about the meaning of LIVESTRONG.  I hope that this post will make you more aware and maybe even inspire you to register for one of the LIVESTRONG Challenges.


Glazed Lemon Buttermilk Cake
(adapted from Cooking Light)

Ingredients 

 Cake:
  • 3 tablespoons grated lemon rind (about 2 lemons)
  • 3 tablespoons fresh lemon juice (about 1 lemon)
  • Cooking spray
  • 1 1/2 cups plus 2 tablespoons granulated sugar, divided
  • 3 cups all-purpose flour (13 1/2 ounces)
  • 1 teaspoon baking powder
  • 3/4 teaspoon salt
  • 1/2 teaspoon baking soda
  • 1/2 cup butter, softened
  • 1 teaspoon lemon extract
  • 3 large eggs
  • 1 cup low-fat buttermilk

Lemon glaze:

  • 1 cup powdered sugar
  • 1 1/2 tablespoons fresh lemon juice
  • 1 tablespoon low-fat buttermilk
  • 1 teaspoon grated lemon rind (optional)
  • 1 teaspoon lemon extract (optional)

 Preparation

  1. Preheat oven to 350°.
  2. To prepare cake, combine rind and 3 tablespoons juice in a small bowl. Set aside.
  3. Coat a 10-inch Bundt pan with cooking spray; dust with 2 tablespoons granulated sugar.
  4. Lightly spoon the flour into dry measuring cups, and level with a knife. Combine flour, baking powder, salt, and baking soda in a large bowl, stirring well with a whisk.
  5. Place butter in a large bowl; beat with a mixer at medium speed until light and fluffy. Gradually add remaining 1 1/2 cups granulated sugar, rind mixture, and extract, beating until well blended. 
  6. Add eggs, 1 at a time, beating well after each addition. 
  7. Add flour mixture and 1 cup buttermilk alternately to sugar mixture, beating at low speed, beginning and ending with flour mixture.
  8. Spoon batter into prepared pan. Bake at 350° for 45 minutes or until a wooden pick inserted in center comes out clean. Cool in pan 10 minutes on a wire rack; remove from pan. 
  9. Cool completely on wire rack.
  10. To prepare glaze, combine powdered sugar, 1 1/2 tablespoons juice, and 1 tablespoon buttermilk in a small bowl, stirring until smooth. Drizzle glaze over warm cake. Garnish with grated lemon rind once glaze is set, if desired.
(Printer Friendly Version)


    September 29, 2010

    Chocolate Hazelnut Rice Krispie Treats

    I have to admit that I am not the biggest fan of Rice Krispie Treats.  My girls think that this is fine since when I make them there is more for them to eat.  I don't know what it is exactly that I don't like.  We have something a little similar in Australia called Chocolate Crackles but I guess I was never a huge fan of those either.  However, I am more than happy to make these for everyone else.

    In a previous post I mentioned that I am a fan of the blog Culinary Concoctions by Peabody.  It was on this blog that I first saw this recipe.  I had to make a few changes because I already had Rice Krispies rather than Cocoa Krispies and I didn't want to buy hazelnut extract when I knew I wouldn't use up the bottle before it expired.  I kept thinking that a little Bailey's liqueur would be nice in these, but I had to remind myself that these were for kids not adults.


    These treats certainly give your arms a workout. They are a sticky, gooey mess when they are first being mixed together.  I was worried that I would never be able to smooth them out the first time I made them, but practice makes perfect.  Well, maybe not perfect, but good enough for me.  Once they cooled down I found that the easiest way to cut them was with a rocking pizza knife.  I wrapped a few for the girls to share with friends at school and the rest disappeared quite quickly.


    Chocolate Hazelnut Rice Krispie Treats
    (Recipe adapted from Culinary Concoctions by Peabody)

    Ingredients
    • 6 Tablespoons butter
    • 16 ounces mini marshmallows 
    • ½ tsp vanilla
    • ½ cup Nutella
    • 7 cups Rice Krispies Cereal
    • 3 cups roughly crushed Pirouette Rolled Wafer Cookies (Chocolate Hazelnut flavor)

    Preparation
    1. Butter or spray a 9-x-13-inch baking pan.
    2. Over low heat melt 6 tablespoons butter in a large stock pot.
    3. Once butter has melted, add marshmallows. Continue to cook over low heat while they melt. It may take a little time. Don’t turn up the heat to try and make it go quicker, you could end up with burned marshmallows or your treats could end up too hard once they firm up. 
    4. Stir in the Nutella and vanilla until fully combined. It may take a little bit of time for the Nutella to melt in.
    5. When most of the marshmallows have melted and they resemble marshmallow crème with a few lumps, remove from heat and add the cereal and cookies.
    6. Using a wooden spoon, stir, stir, stir some more, until all the cereal is fully coated and other parts of the pot are not hogging all the marshmallows (so evenly coated).
    7. Pour into prepared baking pan. Take a rubber spatula and either spray it with non-stick spray or simply get some water on it (I just put mine under the faucet real quick). Using the spatula, press the cereal/marshmallow mixture down into the pan, attempting to create a flat, even surface.
    8. Cover with foil and let sit for a few hours to firm up.
    9. Take foil off. Place wax paper down that is a little bit longer than the baking pan. Flip the pan over onto the wax paper. Cut into squares or shapes.
     Printer Friendly Version


    September 28, 2010

    To Try Tuesday - Pineapple Upside-Down Muffins

    I am drowning under a pile of recipes I have saved to try one day.  The problem is that "one day" never seems to arrive.  So I have set myself a little challenge and I am calling it To Try Tuesday.  Each Tuesday I have to pull one recipe from the pile to try.  After doing a taste test I then have to decide if the recipe is a keeper or not.  A keeper will be entered into MasterCook and a dud will result in the paper being thrown away.  Either way I will be getting rid of a mass of paper floating around my house so it is a win-win situation.

    The first recipe I have chosen is Pineapple Upside-Down Muffins from Eating Well.  I chose this recipe because it reminded of my favorite treat from Starbucks on the Big Island, a honey bran muffin.  I found out on my last visit that they will no longer be offering the muffin in their stores, even though it was one of their best sellers and you had to get there early to get one or miss out.  I don't understand why stores do this.  Anyway, I wanted to find something close and I liked that this had pineapple, brown sugar, and nuts in the topping.


    After reading through the recipe I knew I wanted to make a few adjustments.  I wanted to use macadamias rather than pecans or walnuts because I love the taste of them with pineapple.  Also, since I did not have any whole wheat flour on hand, I used a blend of white and ultra-grain flours that I had purchased from Costco. To make the muffins a little more moist I added some applesauce.  Lastly, I replaced the cinnamon with Baking Spice from Penzeys. There is a note in the recipe about plumping up the raisins by soaking them in hot water.  To give them a bit more flavor I drained the can of sliced pineapple into a cup, heated the juice in the microwave, and then added the raisins.  They plumped up nicely, and I drained them just before I added them to the bowl.


    All in all I was really pleased with how these turned out.  The muffin itself had a nice flavor, but it was the topping that made it.  I think that next time I make these I will double the topping mixture because the taste of toasted macadamias, pineapple, and brown sugar was addictive.  I made a double batch of these muffins but I ended up with 30 muffins.


    Pineapple Upside-Down Muffins

    Ingredients

    Topping

    • 2 tablespoons packed light brown sugar
    • 2 tablespoons chopped walnuts, or pecans (optional)
    • 1 10-ounce can pineapple slices (drained - use the liquid for raisins)

    Muffins

    • 3/4 cup whole-wheat flour (I used a white/ultra-grain flour)
    • 3/4 cup all-purpose flour
    • 2 teaspoons baking powder
    • 1/2 teaspoon baking soda
    • 1/4 teaspoon salt
    • 1 tablespoon Baking Spice
    • 2 large eggs
    • 1/2 cup packed light brown sugar
    • 1/4 cup canola oil
    • 1/4 cup apple sauce
    • 2 tablespoons pineapple juice, or orange juice
    • 1 teaspoon vanilla extract
    • 1 8-ounce can crushed pineapple, (not drained)
    • 1 cup grated carrot, (1 large)
    • 1/2 cup old-fashioned oats
    • 3/4 cup raisins, preferably baking raisins (see Ingredient note)
    • 1/4 cup chopped walnuts, or pecans (optional)

    Preparation

    1. Preheat oven to 400°F. Coat 12 muffin cups with cooking spray.
    2. To prepare topping: Sprinkle 1/2 teaspoon brown sugar into each muffin cup. Sprinkle nuts, if using, over the sugar. Stack pineapple slices and cut into 6 wedges. Place 2 wedges in each muffin cup.
    3. To prepare muffins: Whisk whole-wheat flour, all-purpose flour, baking powder, baking soda, salt and Baking Spice in a large bowl.
    4. Whisk eggs and brown sugar in a medium bowl until smooth. Whisk in oil, juice and vanilla. Stir in crushed pineapple and apple sauce. Make a well in the dry ingredients; add the wet ingredients and stir with a rubber spatula until just combined. Stir in carrot, oats, raisins and nuts, if using. Scoop the batter into the prepared muffin cups (they'll be quite full).
    5. Bake the muffins until the tops are golden brown and firm to the touch, 15 to 25 minutes. Immediately loosen edges and turn muffins out onto a baking sheet. Restore any stray pineapple pieces and nuts. Let cool for at least 10 minutes. Serve upside-down, either warm or at room temperature.
    Makes 12 muffins

    Printer Friendly Version


    September 27, 2010

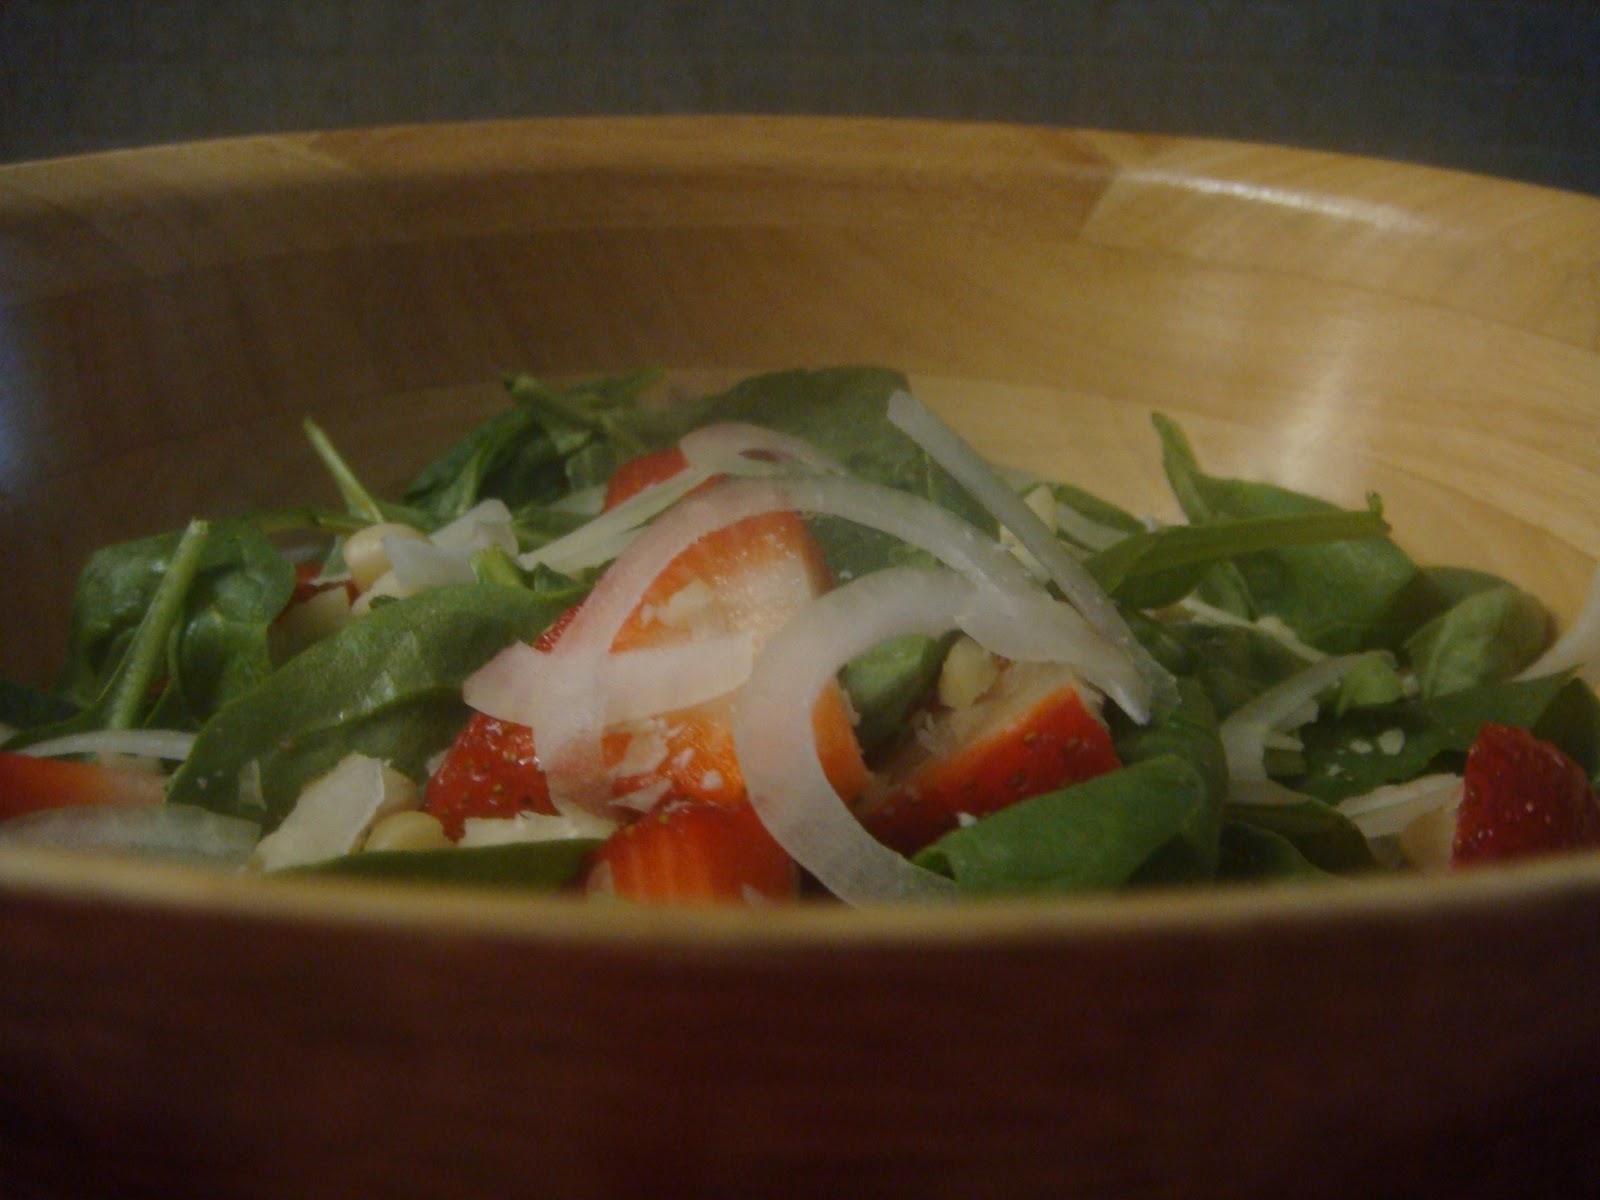
    Strawberry Spinach Salad

    One of my favorite places to have a casual dinner is Kona Brewing Company.  Not only do they have great beer and pizza, but I love their salads too.  Their original restaurant is in Kona, Hawaii and I was so happy when they opened another restaurant here on Oahu.  I could finally enjoy my favorite beer, the Wailua Wheat Ale (which has passionfruit in it) on tap, without having to wait for a trip to the Big Island. For anyone who visits the Big Island I would recommend you sign up for their brewery tour - not only is it informative, but you get samples! And for those who don't have a trip to the Islands in their immediate future Kona Brewing Company beer is available in bottles now - and they are all excellent. And, no I do not work or have any affiliation with this restaurant - I just really like their beer and food.

    It was at Kona Brewing that I first tried a Strawberry Spinach Salad.  It is described on their menu as "fresh spinach covered with strawberries, toasted macadamia nuts, Gorgonzola and Ewa onions, house-made strawberry 
    vinaigrette on the side".  I ordered it each time we ate there and soon realized that I would have to try and replicate the dish at home.

    It turns out that it is not that hard.  I had to play around with the ratios for the dressing, but I think I came up with a pretty good copy of the original.  In this version I used goat cheese because that is what I had in the fridge but it is just as good with blue cheese.  To adjust for the different tastes in our family I sometimes serve the components of the salad in separate bowls so each person can make their own salad according to their taste.  Add some sliced rotisserie chicken and you have a quick and easy meal.


    Strawberry Spinach Salad

    Ingredients
    • 3 cups sliced strawberries, divided
    • 3 tablespoons of white balsamic vinegar (or red if that is what you have on hand)
    • 1 tablespoon olive oil
    • 3 tablespoons sour cream
    • 1/2 cups macadamia nuts, toasted and cooled
    • 10 oz spinach
    • 1/4 cup sliced sweet onion, such as Ewa, Maui, Walla Walla, or Vidalia
    • 1/4 cup crumbled goat cheese or blue cheese
    • salt and pepper to taste

    Preparation
    1. Add 2 cups of strawberries to a blender or food processor.
    2. Add the balsamic vinegar, olive oil, sour cream, salt, pepper, and blend until smooth.
    3. In a large serving bowl add spinach, 1 cup sliced strawberries, toasted macadamias, onion, and cheese. Season with salt and pepper.
    4. Just before serving pour approximately 1/2 cup of dressing into bowl and toss to coat.  Serve immediately.
    5. Refrigerate and leftover salad dressing for use in the next few days.
    Printer Friendly Version