Showing posts with label quick and easy. Show all posts

June 20, 2021

Pina Colada Cake ~ #TheCakeSliceBakers

This little Pina Colada Cakes brings to mind tropical islands and relaxing
in the sun - something we are all hoping to be able to do freely very soon.


November 20, 2020

Hazelnut, Asian Pear & Espresso Cake ~ #TheCakeSliceBakers

"One of the great things about being a grown up is eating cake
for breakfast and not having to ask for permission" author unknown


March 27, 2018

Tahini-Banana Snack Cake ~ #TheCakeSliceBakers

“Cake is happiness! If you know the way of the cake, you know the way of happiness!
If you have a cake in front of you, you should not look any further for joy!”  - C. JoyBell C.

July 14, 2011

To Try Tuesday - Roasted Banana Bread with Browned Butter and Toffee Topping


Sometimes I think I want to give up my blog.  I love the cooking part but I just get so frustrated with taking photos.  They just never seem to turn out the way that I would like them to.  I have these beautiful visions in my head but what I see is not what I get.  I really have no one to blame but myself.  I should learn the ins and outs of my camera, I should take a class in photography, I should read more books on food photography, I should buy some proper lighting.  Lots of "shoulds" but not enough time or finances to do so at the moment.  One day.

Anyway, back to the task at hand.  I had lots of bananas quickly ripening in the fruit basket and I wanted something new to try rather than my go-to recipe for banana bread.  I went through my trusty "To Try" list hoping to find something.  Sure enough there was a great-sounding recipe for Roasted Banana Nut Bread with Browned Butter & Toffee Topping on Karissa's site Baking For Her Soul.

The only changes I made were to omit the nuts and I did not lay the slices of banana on the sides like she did.  The roasting of the bananas brings out the sweetness and adds such a wonderful flavor to the bread.  The crunchy topping was also good, and I can imagine a few different directions to go in if you did want a different topping - a sprinkle of coconut, a cream cheese and passionfruit frosting, even something with peanut butter would be yummy.  And should the bread last long enough to be re-purposed I think it would make an awesome base for a bread pudding.


Roasted Banana Bread with Browned Butter and Toffee Topping

Ingredients
  • 3 medium bananas
  • ⅔ cup brown sugar, separated
  • 4 tablespoons butter, separated
  • 2 tablespoons canola oil
  • ½ teaspoon salt
  • 1 teaspoon cinnamon
  • 1 teaspoon vanilla extract
  • ¼ cup low-fat plain yogurt
  • 2 large eggs, room temperature
  • 1¾ cups all-purpose flour
  • ¾ teaspoon baking soda
  • ⅓ cup toffee pieces for sprinkling on top, optional
  • 2 teaspoons granulated sugar for sprinkling on top, optional

Preparation
  1. Preheat oven to 400°F.
  2. Grease and flour a 9×5 loaf pan.
  3. Peel and slice the bananas into ½-inch pieces and toss them with 1/3 cup brown sugar and 1 tablespoon butter in a foil-lined baking dish.
  4. Bake for 40 minutes, stirring once during baking, until the bananas are browned and cooked through.
  5. Remove from oven and allow to cool.
  6. Reduce oven heat to 350°F.
  7. Whisk together flour, baking soda, and cinnamon in a medium bowl, and set aside. 
  8. On medium heat, brown 3 tablespoons of unsalted butter, swirling the pan several times for about 5 minutes until the butter has started to brown.
  9. Remove from heat and add 1/3 cup brown sugar and salt.
  10. Add the bananas to the browned butter and mash into mixture, until just combined.
  11. Add eggs, vanilla extract, oil, and the yogurt to the butter, sugar and bananas, mix until combined.
  12. Add the wet mixture into the dry mixture, and mix to incorporate fully, but don’t mix past the point where it’s just combined.
  13. Pour into prepared pan.
  14. Sprinkle the toffee bits on top, and then sprinkled the entire top with sugar.
  15. Bake at 350°F degrees on center rack for about 40-50 minutes, until toothpick comes out clean and top is browned.
  16. Remove from oven and allow to cool in loaf pan for about 10-15 minutes before removing the loaf.
  17. Place on a wire rack to cool completely.
Recipe adapted from Baking For Her Soul.

June 25, 2011

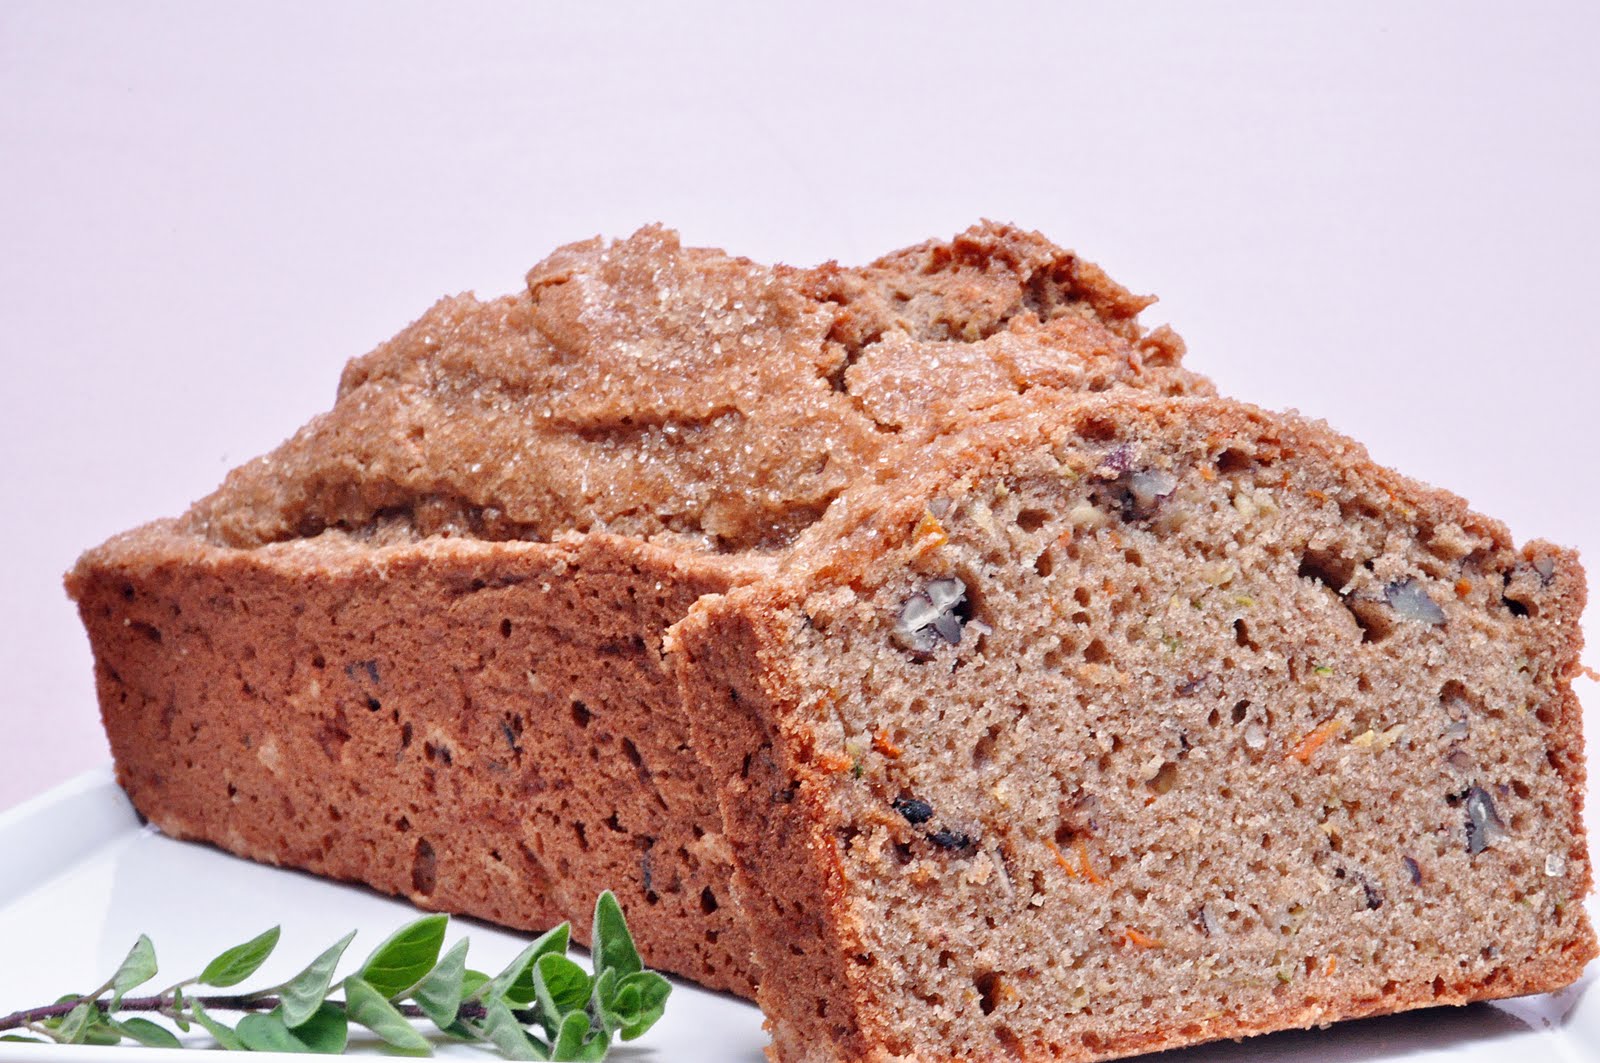
Zucchini-Carrot-Pecan Bread


Every Friday I try to bake something for my husband to take with him the following day.  Early Saturday mornings you will find him out with his training team - a group of dedicated triathletes who find it fun to ride their bikes anywhere from 60-105 miles and then run between 5 and 9 miles (they swim on Friday mornings).  I bake because after all of this hard work they all deserve a treat.

In an effort not to sabotage their training I have been trying to incorporate some healthy elements into my baking - use less sugar, use lot fruits and/or vegetables, cut back on oil.  It is still a work in progress because I have always used lots of butter, cream, sugar, and eggs without even a second thought. One ingredient I haven't experimented with very much is flour.  That is until I was reading Kim's blog, Liv Life, a few days ago and she featured a recipe for chocolate chip cookies (made by her daughter) using spelt flour. 

Following Kim's lead on researching spelt flour I found that it is considered to have a somewhat nuttier and slightly sweeter flavor than whole-wheat flour.  Spelt is by nature a wholefood, and unlike wheat where much of the nutritional bran and germ are often removed during milling, the vital substances of spelt are found in the inner kernel of the grain. Spelt contains more protein, minerals, and amino acids than regular wheat and this superior nutrition makes it an ideal training and endurance food. Although spelt does contain gluten, studies have shown that it can be tolerated by many people who are normally gluten-intolerant.

I do make a lot of quick breads because not only are they tasty but they travel well, which is always handy when it is being thrown in a pick up truck.  Well, maybe "thrown" is not the best description but lets just say that a quick bread is a lot safer than a sponge cake.   With experience I have found that cookies, quick breads, and bar cookies/slices are the way to go when the goodies have to make a trip.


One quick bread recipe that caught my eye recently was a Zucchini-Carrot Bread that appeared on Monica's blog Lick The Bowl Good.  Actually the first thing that grabs my attention each time I visit her blog is that beautiful photo of a Meyer Lemon-Lime Bar in her banner (I can see why the post is entitled "The Best I've Ever Had").  She reached into her archives for this recipe, and it was adapted from a recipe found on Baking with Lisa, who adapted it from Sur la Table’s “Eating Local”.  I adapted it a little further by substituting some spelt flour for the all-purpose flour, adding the toasted pecans, decreasing the sugar and oil, and adding a sprinkle of raw sugar on top.  My last change was to bake one large loaf because my loaf tin is 10 inches x 5 inches.  I really wanted to use candied ginger as described in the recipe but I couldn't find it in my pantry.

Using a single pan will result in a beautiful, high-rising loaf which is just the way I like my quick bread.  I thought the flavor was great, although I may add a little apple sauce next time to add some moisture and compensate for the oil I omitted.  The spelt flour worked out great and I may even do a 50-50 split next time with the all-purpose flour.


Carrot-Zucchini-Pecan Bread
(Printer Friendly Recipe)

Ingredients
  • 2 cups all-purpose flour
  • 1 cup Spelt flour
  • 1½ teaspoons ground ginger
  • 1½ teaspoons ground cinnamon
  • 1 teaspoon baking soda
  • ¼ teaspoon baking powder
  • 1 teaspoon kosher or sea salt
  • ½ cup minced candied ginger (optional)
  • 3 large eggs
  • ¾ cup canola oil
  • ½ cup sugar
  • 2 teaspoons vanilla extract
  • 1 cup coarsely grated carrots
  • 1 cup coarsely grated zucchini
  • 1 cup pecans, toasted and coarsely chopped
  • 2 tablespoons raw sugar, optional

Preparation
  1. Preheat the oven to 325°F. 
  2. Grease two 8.5×4.5 inch loaf pans, or line them with foil or parchment paper (I used one pan that was 10x5 inches).
  3. In a medium bowl, whisk together the flour, ginger, cinnamon, baking powder, baking soda. 
  4. Whisk in the salt and candied ginger, optional.
  5. In a large bowl, whisk the eggs until light and foamy. 
  6. Add the canola oil, sugar, and vanilla, whisking hard until well combined. 
  7. Stir in the carrots and zucchini.
  8. Add the dry ingredients to the egg mixture and stir/fold until just blended.
  9. Divide evenly between the loaf pans (or add to a single pan like I did).
  10. Sprinkle with raw sugar, if desired.
  11. Bake for about 1 hour, until the loaves are firm to the touch and a toothpick inserted in the center comes out clean (mine baked for approximately 75 minutes).
  12. Cool in the pan(s) for 10 minutes, then unmold onto a cooling rack to cool completely.

Recipe by Lick the Bowl Good and Baking with Lisa.

June 23, 2011

To Try Tuesday - Fresh Blueberry Cake


Sometimes you just need a quick and easy cake.  Sometimes that cake will involve a box mix.  Sometimes it will turn out so delicious you will vow to make it again and again.  These three sentences pretty much sum up this cake.

I am not sure how I ended up with three Costco-size punnets of blueberries.  You could say that it was bad planning on my behalf, but I like to think of it as good planning because I decided to make a cake with the extra blueberries.  I didn't really have a recipe in mind but I knew that I had a few boxes of cake mix so I decided to look for a recipe that would "doctor" it up.  As soon as I saw this recipe for an Easy Fresh Blueberry Cake on About.com I knew that it was the one for me.


At first the suggestion on the site of using a lemon cake mix appealed to me but I only had a box of white cake mix, and I decided that I prefer the taste of real lemons.  I love lemon and blueberry together so I did add some extra zest and juice.

This baked up so well in a bundt pan and was delicious both warm from the oven, and after it has cooled.  I think that little mini bundts would be great too.


This post is also linked to Torview's Purple Food Series Palette. 


Fresh Blueberry Cake
Ingredients
  • 3 large eggs
  • ¼ cup granulated sugar
  • ⅓ cup vegetable oil
  • 1 cup sour cream
  • Juice and finely grated zest of 2 lemons (about 1/4 cup juice)
  • 1 box (18.25 ounces) yellow cake mix with pudding in the mix (I used white)
  • 2 cups fresh cleaned blueberries

Preparation
  1. Grease and flour a 10 to 12-cup Bundt cake pan or 10-inch tube pan. 
  2. Heat oven to 325°F for a dark pan or 350F° for a light-colored pan.
  3. Beat eggs with sugar until light. 
  4. Beat in the oil, sour cream, lemon juice, and lemon zest. Continue beating until smooth. 
  5. Slowly blend in the cake mix then beat until well blended. 
  6. Fold in the blueberries. 
  7. Spoon into the prepared baking pan; smooth the top. 
  8. Bake for 50 to 60 minutes, or until a toothpick comes out clean when inserted into the cake.
  9. Dust with powdered sugar or serve with a vanilla glaze or lemon sauce, if desired.
Recipe by Diana Rattray, About.com Guide

June 15, 2011

To Try Tuesday - Blueberry Zucchini Bread


Here it is To Try Tuesday and I feel a little behind the eight ball.  I had actually made a few things in advance knowing that I was heading to the Big Island to see my husband compete in a Half-Ironman triathlon, but I seem to have been playing catch up ever since and my blog has suffered which has made me a little sad.


The good news is that my husbands hard work paid off and he was first in his age group (and 12th overall!) and earned a spot to the Ford Ironman World Championships in Kailua-Kona this October.  The girls and I were really glad to be there to cheer him on to his win and take lots (I mean lots) of photos. I always love spending time on the Big Island, and this course is just beautiful, but it is even sweeter with his victory.


OK, back to your regularly scheduled post.  I was recently searching for a recipe for a blueberry quick bread when I came across this recipe by Jamie at My Baking Addiction.   Once you visit her blog you will have a baking addiction too.  Her recipes are amazing, her photos are stunning, and she has very cool giveaways.  A few of her recent posts include Key Lime Pie Ice Cream, Cherry Crisp in Jars, and Heath Bar Cupcakes.  Let me just say that 13,379 (and counting) people on her Facebook page can't be wrong.  If you haven't guessed already I do have a blogging crush on her blog. Where is that little embarrassed smiley when you need it?


Anyway, this quick bread was a big hit with my husband's Saturday training group.  They loved the fact that it had blueberries and zucchini, and a bit of whole wheat flour in it, so it didn't totally negate all of the hard work they had put in training before consuming it. I did sneak a piece the night before and I totally agree that this is a very tasty bread.  It will definitely be a repeater in my household.


Blueberry Zucchini Bread

Ingredients
  • 2 eggs, lightly beaten
  • ½ cup vegetable oil
  • 2 teaspoons vanilla extract
  • ½ cup white sugar
  • ½ cup brown sugar, lightly packed
  • 1 cup shredded zucchini
  • ¾ cup all purpose flour
  • ¾ cup whole wheat flour
  • ½ teaspoon kosher salt
  • ½ teaspoon baking powder
  • ⅛ teaspoon baking soda
  • 1½ teaspoons ground cinnamon
  • 1 cup fresh blueberries 
  • 2 tablespoons of coarse sugar

Preparation
  1. Preheat oven to 350°F.
  2. Lightly grease an 8.5 x 4.5 loaf pan.
  3. In a large bowl, beat together the eggs, oil, vanilla, and sugars.
  4. Fold in the zucchini.
  5. Beat in the flours, salt, baking powder, baking soda, and cinnamon.
  6. Gently fold in the blueberries.
  7. Transfer to the prepared loaf pan. 
  8. Sprinkle with the coarse sugar.
  9. Bake 55-65 minutes in the preheated oven, or until a knife inserted in the center of a loaf comes out clean.
  10. Cool 20 minutes in pan, then turn out onto wire racks to cool completely.
Recipe by Jamie at My Baking Addiction

June 03, 2011

Chicken Satay Salad


Sometimes a recipe just does not look overly appetizing in a photograph but has unbelievable flavor.  This is one of those recipes.  I know that the funny yellow color might be a little off-putting but after one bite you will be a believer in this dish.

I honestly don't remember where this recipe came from but there have been some changes made to the original recipe over the years.  It may have come from The Australian Women's Weekly, as this was the magazine of choice in my household growing up.  It is something I used to make all the time because it can be made in advance and simply plated when you are ready to eat, so it is the perfect dish for a potluck or a picnic.  Since it is served cold it also makes a great dinner on a hot summers' night.


This dish does need to be made at least a day in advance since it needs to chill overnight.  This was always a hit with my family because although it is a curry, it is more of a sweet curry than a spicy one.


Chicken Satay Salad

Ingredients
  • 500 g chicken breast fillets (3-4)
  • 2 tablespoons vegetable oil
  • 2 teaspoons curry powder
  • 1 medium onion, chopped finely
  • 1 clove garlic, crushed
  • 340 ml can coconut milk
  • ½ cup crunchy peanut butter
  • 1 tablespoon soy sauce
  • 1 tablespoon honey
  • ¼ cup plain yogurt
  • ¼ cup water
  • 1 bunch curly leaf lettuce
  • Small punnet cherry tomatoes
  • ½ cup cashews, divided

Preparation
  1. Cut chicken into thin strips.
  2. Heat oil in a large pan. Add curry powder, onion, and garlic; cook for 2 minutes or until onion is soft.
  3. Add chicken; cook for 5 minutes or until chicken is cooked through.
  4. Stir in coconut milk, peanut butter, soy sauce and honey; bring to a boil, then simmer for about 5 minutes until sauce has slightly thickened.
  5. Refrigerate chicken for several hours or until cold.
  6. Remove chicken from sauce. Whisk yogurt and water into remaining sauce. Return chicken to sauce and add ¼ cup cashews; mix thoroughly.
  7. Line a serving platter with lettuce. Top with chicken, halved tomatoes, and remaining cashew nuts.


Adapted recipe by All That's Left Are The Crumbs

March 14, 2011

Caesar Spaghetti


I'll be the first to admit that I find Rachael Ray a little over-the-top perky and I have to be in the right mood to watch her show.  When I saw her latest cookbook, Look + Cook, at the library I hesitated a little before adding it to the stack I was borrowing.  And then I forgot about it.  Well, not enough to earn me a library fine, but enough to give me just one quick look through before it was due.  I have to say that there were a few recipes that peaked my interest.  One recipe that jumped out at me was Caesar Spaghetti, and I quickly noted the recipe before I placed the book in the return basket.

Caesar Salad is a favorite around here, so I figured that these flavors in a spaghetti dish would be popular too, and I was right.  It is very easy to put together and the flavors were good.  I wish the sauce had been a little thicker, so I might play around with that a little.  I also found that the recipe was missing the croutons that you would expect to find on a Caesar Salad.  To fix this problem I cut some Hawaiian Sweet Bread rolls in half and lightly toasted them, and then gave them a nice schmear of garlic butter.  Problem solved.


I did have to make a few adjustments.  I looked everywhere but I could not find escarole.  Suitable substitutions are kale and spinach, so I went with spinach and it seemed to work out well.  Also, my daughters are not fans of little fishies (anchovies) so I omitted them and used the full tablespoon of Worcestershire sauce.  Leftovers were good too.


Caesar Spaghetti
(Printer Friendly Recipe)

Ingredients

  • salt
  • 1 pound spaghetti
  • 1/4 cup extra-virgin olive oil, plus some for drizzling
  • 6 anchovy fillets, drained
  • 4 large cloves garlic, grated or finely chopped
  • 2 teaspoons to 1 tablespoon Worcestershire sauce
  • 2 medium heads escarole, washed
  • 1 lemon, halved
  • Freshly ground black pepper
  • 1/4 teaspoon freshly grated nutmeg, or to taste
  • 2 large egg yolks
  • 1 cup grated Pecorino Romano
Directions
  1. Bring a large pot of water to a boil over high heat. 
  2. Once boiling, salt the water and then add the pasta and cook until just shy of al dente, according to package directions. Before draining reserve 1 cup of the starchy cooking water.
  3. While the pasta is cooking, put a large skillet over medium-high heat and add the extra-virgin olive oil. Add the anchovies and cook until they've melted into the oil, about 2 minutes. 
  4. Reduce the heat to medium-low and add the garlic, stir 1 minute then add in Worcestershire. 
  5. Shred the escarole and add several handfuls at a time, wilting the greens in the garlic oil. 
  6. Dress the greens with lots of pepper and a little nutmeg, then squeeze the juice of 1 lemon over the pan. 
  7. Place egg yolks in a small bowl and gradually add the reserved starchy cooking water to temper them - do this slowly or you will get scrambled eggs.
  8. Turn off the heat and add the drained pasta and the egg mixture. Stir to combine. 
  9. Add half of the cheese and toss vigorously for 1 minute. 
  10. Dress the pasta with a drizzle of extra-virgin olive oil and transfer to a serving dish. 
  11. Pass the remaining cheese at the table.
Recipe by Rachael Ray

February 24, 2011

Don't Have a Hissy Fit


There was violent shaking and a constant hissing and I remember my grandfather shouting "she's going to blow!"  Of course this is what he said every time my grandmother used her pressure cooker.  As a child I didn't know whether to believe him or not.  The lid never did blow off the top but I was always very careful about being in the kitchen whilst the pressure cooker was on the stove.


About six months ago I purchased a pressure cooker from Costco.  I had every intention of opening it right away and learning how to use it to make some delicious soups, stews, and corned beef, just like my grandmother did.   Something always seemed to hold me back and the box was placed back in the cupboard.

Finally I took the plunge by taking a class taught by Alyssa Moreau called Cooking Under Pressure.  This non-credit class took place at the Culinary Institute of the Pacific, located in the Kapiolani Community College. It was a hands-on class and we were encouraged to bring our own pressure cookers so that we could get to know them better.  I was going on a date with my pressure cooker!  The other great thing about the class was that we were going to make four dishes - Kabocha-Hominy Stew, Sweet Potato-Corn-Kale Soup, White Bean Stew with Salad Greens on Top, and a Double Mushroom-Barley Soup.  After a brief demonstration of the dishes by Alyssa we were ready to go.  We split into kitchens and worked in teams so that we could complete all of the dishes in four hours. All of the ingredients had been allotted to us but we were responsible for the peeling, chopping, and measuring them. It was a blast and we were able to bring home the dishes we cooked, as well as the left-over ingredients so that we could get some additional practice at home.


The kitchens.


Our instructor Alyssa Moreau.


The recipe I am featuring in this post is the Kabocha-Hominy Stew. Since I had the additional ingredients from the class I decided it would make a great dinner, with a nice loaf of crusty bread on the side.  The only changes I made were to some spinach at the end and, although the original recipe called for cayenne to be added at the end of the cooking time, I didn't want any additional heat so I left it out.  I have never tried hominy before but I liked it in this stew. If you don't care for it feel free to substitute a can of corn in this recipe.  This recipe was provided by the Alyssa and so I am not sure if it is one of her recipes, or if it came from a cookbook.

After taking the class I can honestly say that I am no longer afraid of my pressure cooker.  Our instructor, Alyssa, also recommended the book Cooking Under Pressure by Lorna Sass.  I have requested it from the library so I can take a look before buying it.  I also did a quick web search and found that Lorna Sass has her own blog called Pressure Cooking with Lorna Sass.


Kabocha-Hominy Stew
(Printer Friendly Recipe)

Ingredients
  • 1 teaspoon cumin
  • 1 tablespoon olive oil
  • 1/2 cup red onion, chopped
  • 1 teaspoon honey
  • 1 tablespoon chili powder
  • 1 clove garlic, minced
  • 4 cups kabocha, chopped into 1 1/2 inch chunks
  • 4 cups vegetable stock
  • 1 (15oz) can hominy, drained
  • 2 tablespoons rice flour (or corn flour)
  • 3 tablespoons water
  • 1/2 cup green bell pepper, finely chopped
  • 4 cups of spinach
  • 1/4 cup cilantro, chopped
  • 1/2 lime, juiced
  • salt
  • pepper

Preparation
  1. Mix flour and water together to make a slurry.
  2. Dry toast the cumin in a saucepan.  Remove from pan.
  3. Heat oil in the same pan and add the cumin seeds, onion, and honey and saute until onion is lightly browned.
  4. Add chili powder and garlic to saucepan and cook for a few minutes.
  5. Add the onion mixture, kabocha, and hominy to the pressure cooker and cover with broth.
  6. Place lid on pressure cooker and bring up to pressure, then reduce heat to maintain pressure and cook for 5 minutes.
  7. Take off heat and release pressure.
  8. Uncover and add in the flour slurry and stir until the stew is thickened.
  9. Stir in the bell pepper, spinach, and cilantro and cook for 2-3 minutes.
  10. Season with lime juice, salt and pepper to taste.

Makes about 4 servings.

Recipe courtesy of Alyssa Moreau - Culinary Institute of the Pacific at Kapiolani Community College.